A Practical Guide to Editing Images with GPT Image 2
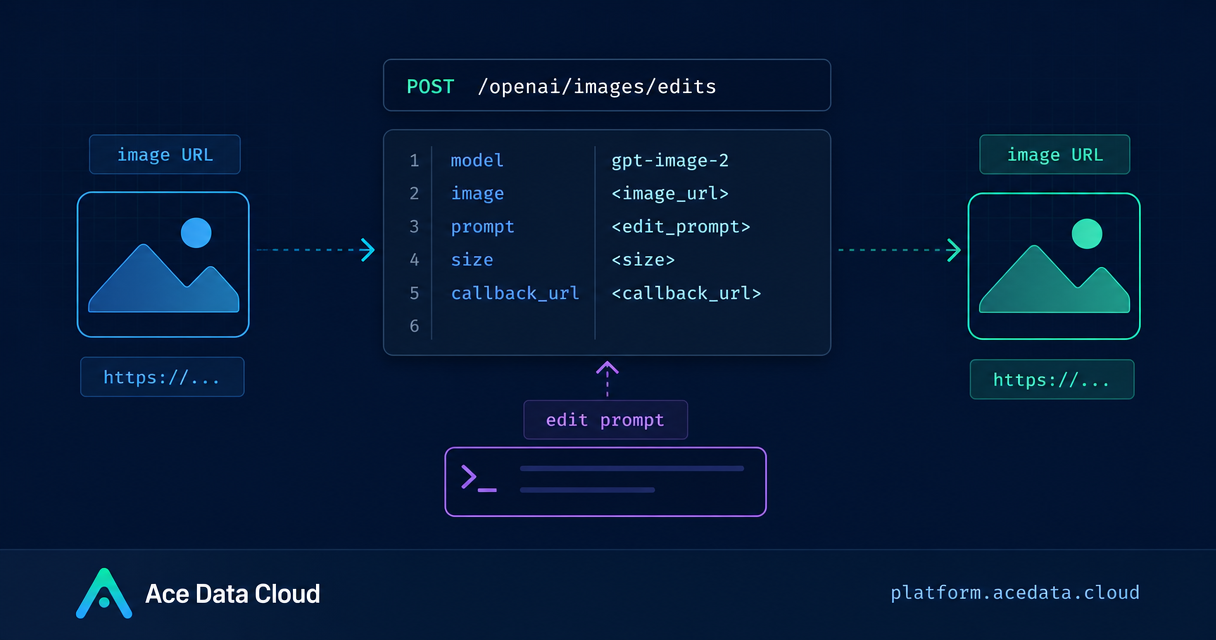
Image editing gets tricky when you need to change one visual detail without rebuilding the whole asset from scratch. The GPT Image 2 / 2.5 image editing endpoint gives builders a practical way to take an existing image, describe the change, and receive an edited output while preserving the parts that should stay stable.
What you can do
The /openai/images/edits endpoint is designed for instruction-based image editing. Instead of generating from a blank prompt, you provide one or more reference images and a clear edit instruction. Typical use cases include:
- Changing a single visual attribute, such as an object color or background.
- Keeping composition, camera angle, layout, and shadows while replacing one element.
- Using multiple reference images when an edit needs more context.
- Running long image jobs asynchronously with a
callback_url.
The document describes both JSON requests with image URLs and multipart/form-data uploads for local files. It also lists the commonly used fields: model, image, prompt, size, n, response_format, and callback_url.
How it works
The basic workflow is simple: send a request to https://api.acedata.cloud/openai/images/edits, authenticate with a Bearer API key, pass an input image, and describe the exact edit you want. A synchronous response can include created and data, where data contains the output image URL. For longer tasks, you can include callback_url; the API can return a task_id, and the final result is delivered to your callback when the job completes.
The important builder habit is to be explicit about what should not change. For example, the documentation’s sample prompt asks the model to keep the mug, tabletop, camera angle, portrait layout, and soft shadow unchanged, while changing only the mug color and background. That style of prompt is more operational than decorative: it defines the edit boundary.
Editing from an image URL
If your source image already lives at a reachable URL, JSON is the most direct option. The documented endpoint accepts image as a single URL or as an array of URLs. Here is the shape of the request from the guide, with the same endpoint, model, and fields:
curl https://api.acedata.cloud/openai/images/edits \
  -H "Authorization: Bearer your API Key" \
  -H "Content-Type: application/json" \
  -d '{
    "model": "gpt-image-2",
    "image": "https://platform2.cdn.acedata.cloud/gpt-image/d56455e2-e7f7-4bcd-b935-475b0a1e0948_0.png",
    "prompt": "Keep the mug, tabletop, camera angle, portrait layout, and soft shadow unchanged. Change only the mug color from white to vivid orange and the pale cream background to solid dark navy blue. No text and no logo.",
    "size": "1024x1536"
  }'
A successful response can include success, task_id, trace_id, created, model, data, and usage. The image URL is returned inside data:
{
  "success": true,
  "task_id": "49848451-c624-4df9-9dc2-494018daaf4c",
  "trace_id": "5ac021c2-2891-4eed-bfcf-4c6668ac1be1",
  "created": 1788831893,
  "model": "gpt-image-2",
  "data": [
    {
      "url": "https://platform2.cdn.acedata.cloud/gpt-image/49848451-c624-4df9-9dc2-494018daaf4c_0.png"
    }
  ],
  "usage": {
    "input_tokens": 775,
    "output_tokens": 1372,
    "total_tokens": 2147
  }
}
Uploading a local image
For a local file, use multipart/form-data. In that mode, image is sent as a file field. The guide shows this minimal form:
curl https://api.acedata.cloud/openai/images/edits \
  -H "Authorization: Bearer your API Key" \
  -F "model=gpt-image-2" \
  -F "image=@input.png" \
  -F "prompt=Replace the background with a bright modern studio"
This is useful in internal tooling where designers or operators upload a file from a local workflow. The same endpoint can also accept repeated image fields; the GPT Image series supports up to 16 reference images. When using JSON, the equivalent is a single URL or an array of up to 16 URLs.
Choosing size, output format, and async behavior
The size field can be auto or a compliant WIDTHxHEIGHT. The size rules matter: width and height must be multiples of 16, the long side must not exceed 3840, total pixels must be between 655,360 and 8,294,400, and the aspect ratio must not exceed 3:1. If size is omitted or set to auto, the model chooses the aspect ratio based on the prompt and the first reference image.
The n field supports 1–10 outputs, with one caveat from the documentation: when response_format is b64_json, only n=1 is supported. For most web apps, response_format=url is the simplest path because the output can be rendered or stored by URL.
For long-running jobs, add a callback:
{
  "callback_url": "https://example.com/webhooks/images"
}
In asynchronous mode, the response can be as small as {"task_id": "..."}. The final result is then posted to the callback URL. That pattern is a better fit for production systems than holding an HTTP request open while a user waits.
Troubleshooting notes
The guide gives a compact set of checks for common failures. A 400 usually points to image format or quantity, parameter combinations, or size formatting. A 401 means you should check the API key and Bearer header. A 429 indicates request frequency. A 504 is a signal to switch to asynchronous callback handling.
Error responses include a trace_id. If you need to report a problem, share that ID rather than the API key.
Putting it into a builder workflow
The practical way to use this endpoint is to wrap it in a small internal tool: upload or paste an image URL, collect a precise edit instruction, choose a size, and submit the request. Store the returned task_id, trace_id, and output URL. Over time, those three fields make debugging and audit trails much easier.
For the full parameter list and the source examples this guide is based on, read the OpenAI Images Edits API Integration Guide.


Comments
Post a Comment