How to Use NanoBanana MCP in Cursor for Practical Image Editing
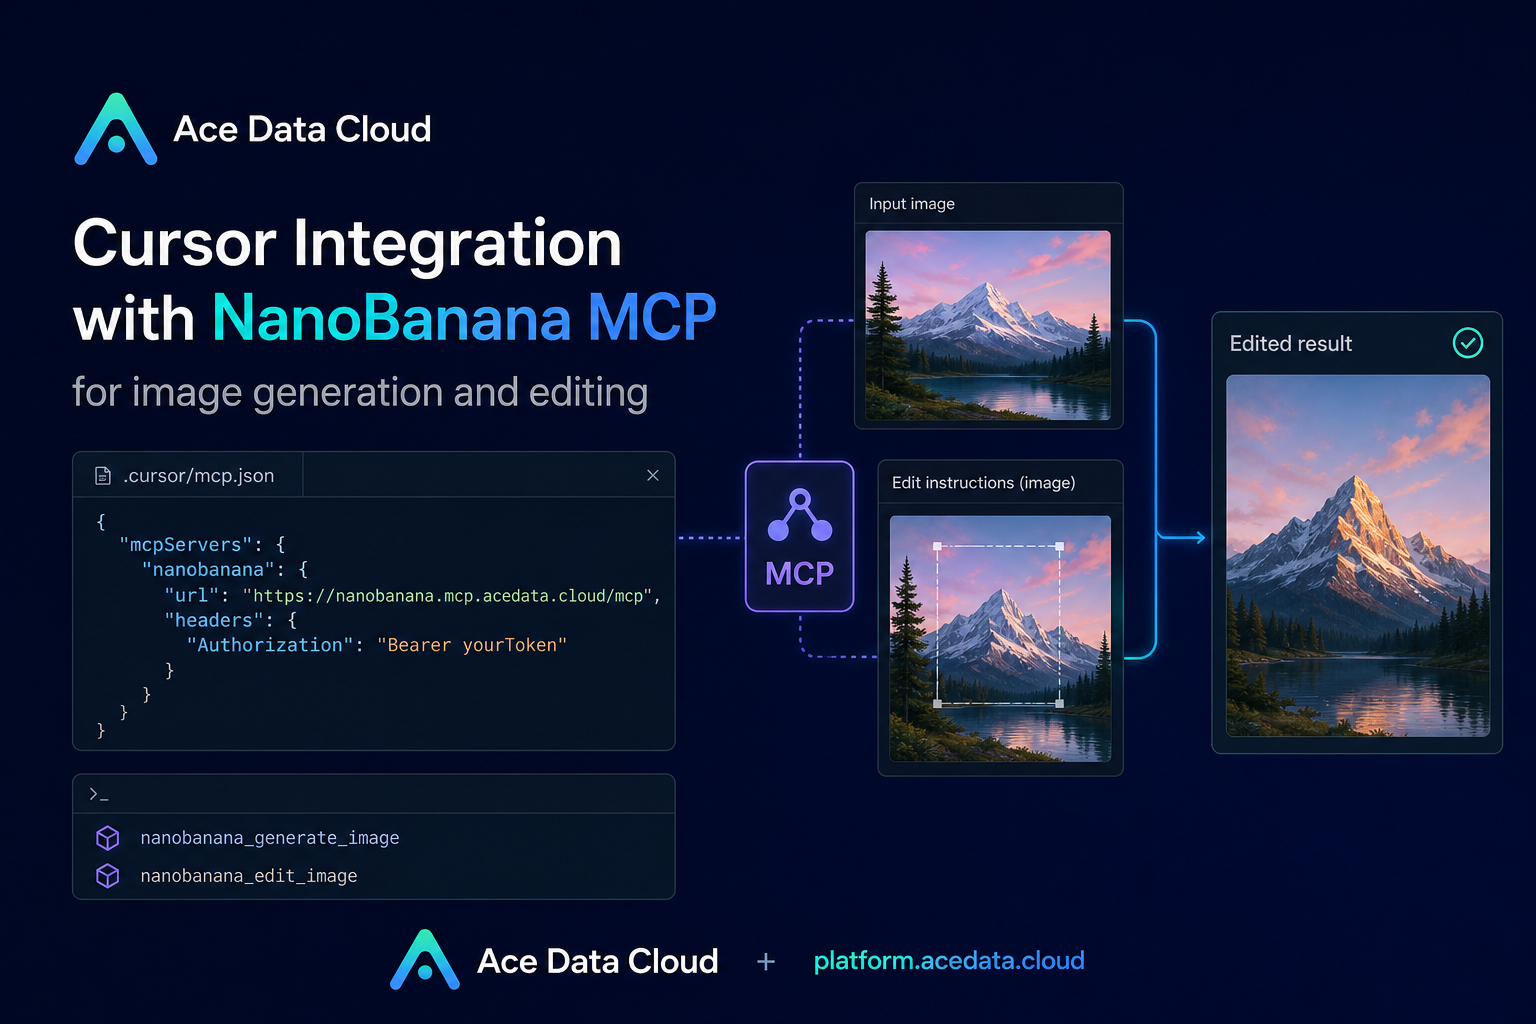
Most developer image work is not about making a perfect artwork from scratch. It is usually smaller and more practical: clean up a screenshot, place a product cutout into a scene, turn a rough UI capture into a presentable blog image, or create a simple illustration for an error page. The useful question is: can you do that without leaving your editor?
The Cursor integration with NanoBanana MCP is built for exactly that workflow. Instead of opening a separate image tool, downloading assets, and manually passing files around, you configure an MCP server once and then ask Cursor Agent to call image generation or editing tools directly from your project.
What you can do
The document describes two practical capabilities exposed through the NanoBanana MCP server:
nanobanana_generate_imagefor text-to-image generation.nanobanana_edit_imagefor image editing, including multiple image inputs.
The interesting part is the second one. NanoBanana is described as especially useful for modifying an existing image, not only creating a new one. The guide gives examples such as beautifying a terminal screenshot, placing the product from one image onto the background of another, redrawing one image in the style of another, and generating a small illustration for a 404 page.
That makes it a good fit for builders who already work inside Cursor: documentation images, launch notes, README assets, product mockups, and quick visual experiments can all start from the same agent conversation where you write code.
How it works
The integration uses MCP, so Cursor talks to a remote HTTP MCP server. Your project-level configuration lives in .cursor/mcp.json. The server URL from the document is:
https://nanobanana.mcp.acedata.cloud/mcpAuthentication is sent through an HTTP header:
Authorization: Bearer yourTokenAfter the file is saved and Cursor is restarted, the NanoBanana tools become available in Agent mode. From the builder’s point of view, the workflow is simple: put the MCP config in the repo, restart the editor, attach or reference images when needed, and ask the agent for the edit in plain language.
Configure Cursor
Create a .cursor directory in your project root if it does not exist, then add mcp.json:
{
  "mcpServers": {
    "nanobanana": {
      "type": "http",
      "url": "https://nanobanana.mcp.acedata.cloud/mcp",
      "headers": {
        "Authorization": "Bearer yourToken"
      }
    }
  }
}
Replace yourToken with your Ace Data Cloud API token. Keep this file out of places where secrets might be exposed. If your repository is shared, treat the token like any other credential and avoid committing it publicly.
Once the file is saved, restart Cursor. The document states that after restart you can use NanoBanana’s image generation and editing features in Agent mode.
Use case 1: turn a raw screenshot into a blog-ready asset
A common documentation problem is that real screenshots are useful but not always presentable. Terminal captures can look flat, cramped, or visually disconnected from the rest of a blog post. The guide’s example prompt is:
Edit this image, add a rounded corner shadow window decoration, and change the background to a light gray gradient.This is a good first test because it does not require a complicated composition. You can start with one screenshot and ask for a clear visual treatment: rounded window frame, soft shadow, and a neutral background. The output is still based on the original screenshot, but it becomes easier to use in a tutorial, changelog, or README.
Use case 2: compose a product image with a scene
The more powerful workflow is multi-image editing. The document says nanobanana_edit_image supports passing multiple image URLs and that the AI understands the relationships between images. One example is taking the product from the first image and placing it into the second image:
Place the phone from the first image onto the desktop in the second image, adjusting the size and perspective to make it look natural.This is useful when you have a product render, a device screenshot, or a UI capture, and you want to test how it looks in a more realistic environment. The important detail is to describe the role of each input image: which one contains the product, which one contains the background, and what should be adjusted, such as size, perspective, or lighting.
Use case 3: generate lightweight illustrations from the editor
For cases where you do not have a source image, nanobanana_generate_image handles text-to-image generation. The document gives a 404 page illustration prompt:
Generate an illustration of a small dinosaur lying next to a crack in the broken ground looking down, to be used for a 404 page.This kind of asset is small but valuable. A custom empty state, error page, or onboarding illustration can make a product feel more complete, and generating it from Cursor keeps the design task close to the implementation work.
A practical workflow for builders
- Add the
.cursor/mcp.jsonconfiguration. - Restart Cursor and open Agent mode.
- Choose whether the task is generation or editing.
- For editing, provide one or more image URLs and describe each image’s role.
- Ask for a constrained output: background, perspective, style, or final use case.
- Review the result and iterate with small changes rather than rewriting the whole prompt.
The main habit is to be specific about the transformation. “Make it better” is vague. “Add a rounded window decoration, soft shadow, and light gray gradient background” gives the model a concrete target. For multi-image composition, explicitly name the first image and second image, then explain what should move from one to the other.
Other editor options
The same document also notes similar configuration paths for other environments: VS Code uses .vscode/mcp.json with the same configuration under servers; Claude Desktop uses a mcpServers configuration file in the platform-specific Claude Desktop config path; Claude Code uses terminal command-line configuration.
But Cursor is a natural starting point if your work already happens inside an agentic coding loop. The setup is small, the server URL is explicit, and the two tool names map cleanly to the two common jobs: create an image or edit an existing one.
If you want the original configuration and examples, read the Ace Data Cloud documentation for Cursor Integration with NanoBanana MCP.


Comments
Post a Comment