How to Edit Images from VS Code with NanoBanana MCP
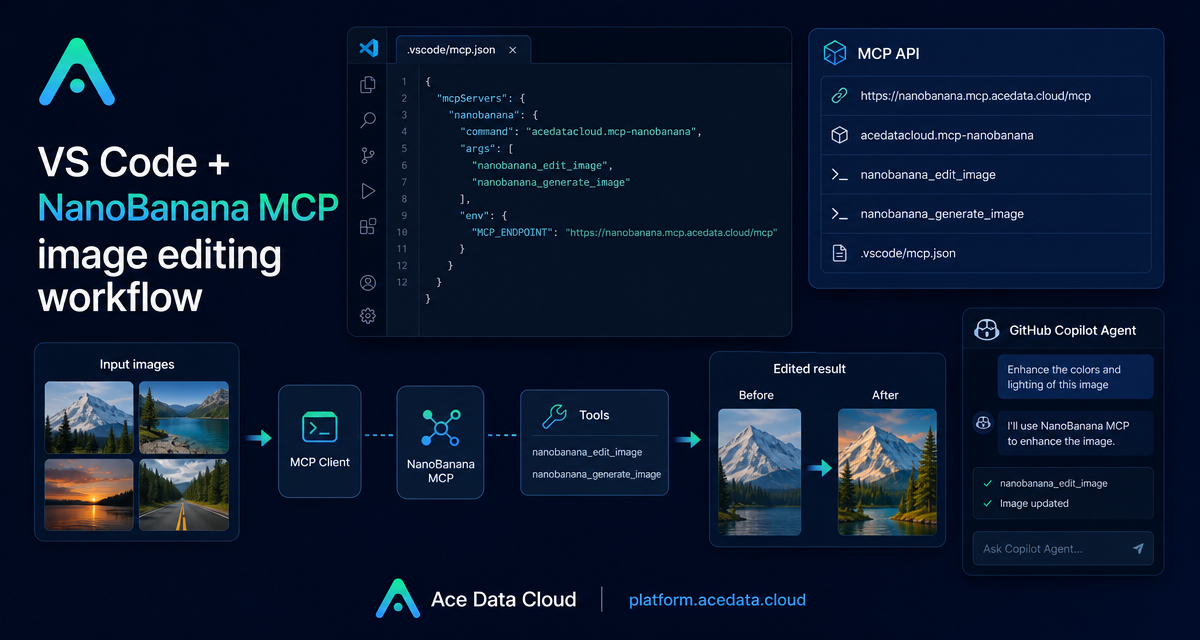
Image work inside developer projects is rarely a clean text-to-image task. More often, you already have assets: a product screenshot, a UI mockup, a photo, or two reference images. The real job is to change something precisely without leaving your editor.
This guide walks through using NanoBanana MCP in VS Code so GitHub Copilot Agent can call image generation and image editing tools from the same workflow where you write code, inspect UI states, and update project assets.
What you can do
The VS Code + NanoBanana MCP setup is useful when you want image editing to behave like a developer tool rather than a separate design app. Based on the documented workflow, the MCP server exposes two tools:
nanobanana_generate_imagefor text-to-image generation.nanobanana_edit_imagefor image editing, including multi-image input.
The practical difference is important. If you need a small empty-state illustration, generation is enough. If you already have a screenshot and want to replace text, combine a phone screenshot with a hand-held phone photo, or apply the look of one image to another, editing is the better fit.
How it works
NanoBanana is exposed to VS Code through the Model Context Protocol. In practice, VS Code or GitHub Copilot Agent talks to an MCP server, and that server provides image tools the agent can call when your prompt mentions nanobanana.
You can install the extension from the VS Code Extensions Marketplace by searching for NanoBanana MCP, or by searching the extension ID acedatacloud.mcp-nanobanana. After installing, reload VS Code if prompted.
The extension needs an Ace Data Cloud API key. In VS Code, open the command palette with Cmd+Shift+P, run NanoBanana MCP: Set Ace Data Cloud API Key, paste the key, and press Enter. The documentation states that the key is stored in VS Code SecretStorage or the system keychain. If you need to replace it later, run NanoBanana MCP: Clear Ace Data Cloud API Key and set it again.
Manual MCP configuration
If you prefer project-local configuration, create .vscode/mcp.json. This is useful when you want the MCP server definition to travel with the repository while still prompting each developer for their own API key.
{
  "servers": {
    "nanobanana": {
      "type": "http",
      "url": "https://nanobanana.mcp.acedata.cloud/mcp",
      "headers": {
        "Authorization": "Bearer ${input:acedata-token}"
      }
    }
  },
  "inputs": [
    {
      "id": "acedata-token",
      "type": "promptString",
      "description": "Ace Data Cloud API key",
      "password": true
    }
  ]
}
The important fields are servers.nanobanana.type, which is http, the server url, which is https://nanobanana.mcp.acedata.cloud/mcp, and the Authorization header. The inputs block tells VS Code to request the API key as a password-style prompt instead of hard-coding a secret in the repository.
Verify it from Copilot Agent
Once the extension or mcp.json configuration is in place, open GitHub Copilot Chat and switch to Agent mode. Then make a direct request and mention NanoBanana explicitly, for example:
Use nanobanana to help me complete this task.On the first call, the workflow routes to the extension and uses the saved API key. A good first test is something low-risk, such as generating a simple 400x400 empty-state illustration for a UI component. That exercises nanobanana_generate_image without depending on local image inputs.
Use case: editing screenshots without leaving the IDE
One documented scenario is modifying text in an existing screenshot. For example, suppose you have a screenshot of a 404 page and want the heading to become a custom error message while preserving the original visual style. You can ask:
Change "Page Not Found" in this screenshot to "Backend is slacking off, please try again later," keeping the original font style.That kind of request is awkward in a traditional text-to-image flow because the goal is not to create a new image from scratch. You want the model to understand the existing screenshot, locate the relevant text area, and produce a coherent edit.
Use case: combining multiple image inputs
The more interesting workflow is multi-image editing. The documentation gives a concrete example: you have an app screenshot and a photo of a hand model, and you want a natural product image where the phone displays the app. A prompt can be as direct as:
Combine these two images: the first phone screenshot is displayed on the screen of the second hand-held phone photo, maintaining a natural perspective effect.This is where nanobanana_edit_image fits well. The agent can treat the images as inputs and ask the MCP tool to compose them according to the prompt. For builders, that means faster iteration on app store mockups, landing page assets, documentation screenshots, and small UI illustrations.
When to use generation instead of editing
Not every asset starts from an existing file. For empty states, placeholder artwork, lightweight UI illustrations, and quick concept images, use nanobanana_generate_image. A documented example is:
Generate a 400x400 empty state illustration of a cat napping beside an empty box, with simple lines and a light blue and gray color scheme.The builder-friendly pattern is simple: generate when the asset does not exist yet; edit when the source image already carries layout, content, or visual identity you want to preserve.
A practical workflow
- Install
acedatacloud.mcp-nanobananain VS Code, or add the documented.vscode/mcp.json. - Store the API key with
NanoBanana MCP: Set Ace Data Cloud API Key. - Open Copilot Chat in Agent mode.
- Ask for a generation or edit task and mention
nanobanana. - Save the generated asset into your project and iterate from the editor.
The point is not to replace a full design process. It is to remove friction for the image tasks that slow builders down: screenshot localization, UI placeholder art, small visual variants, and composed product mockups.
Read the full Ace Data Cloud documentation for the exact VS Code setup and related editor options: VS Code integration with NanoBanana MCP.


Comments
Post a Comment