How to Edit Images from Cursor with NanoBanana MCP
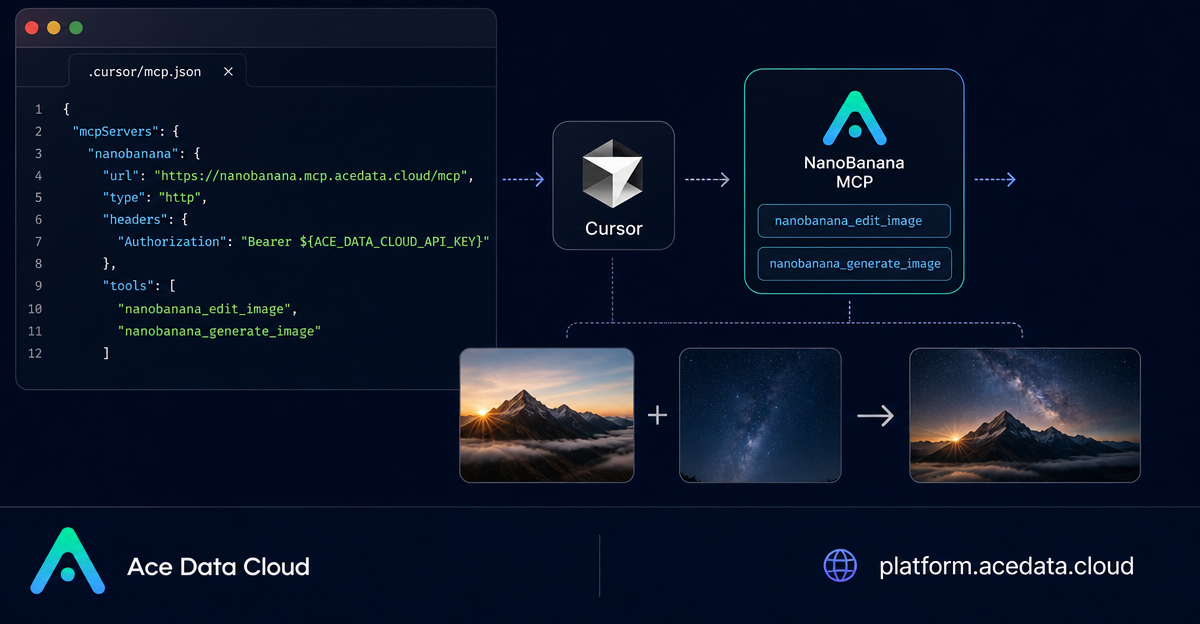
When you are writing inside Cursor and realize a screenshot, product mockup, or empty-state illustration needs a quick visual pass, the usual workflow is awkward: leave the editor, open a design tool, upload assets, write a prompt somewhere else, download the result, then come back to the codebase. The NanoBanana MCP setup lets you keep that loop inside Cursor Agent mode.
What you can do
The NanoBanana MCP document focuses on a practical image workflow: generation and editing from an MCP server that Cursor can call over HTTP. The documented tools are nanobanana_generate_image for text-to-image generation and nanobanana_edit_image for image editing. The editing path is especially useful because it supports multiple image URLs, so an agent can reason over more than one visual input.
That makes it a good fit for builder tasks such as:
- polishing a terminal screenshot before publishing a blog post or README;
- placing a product from one image into a scene from another image;
- redrawing one image in the style of another;
- creating a 404 illustration or other lightweight product art directly from a prompt.
The key idea is not that the model replaces design judgement. It removes the slow handoff between coding, prompting, and visual iteration.
How it works
Cursor can connect to external tools through MCP configuration. For NanoBanana, the documented server is an HTTP MCP endpoint:
https://nanobanana.mcp.acedata.cloud/mcpThe server is added to a project-level Cursor config file at .cursor/mcp.json. The config declares a server named nanobanana, sets type to http, and sends an Authorization header with a bearer token.
{
  "mcpServers": {
    "nanobanana": {
      "type": "http",
      "url": "https://nanobanana.mcp.acedata.cloud/mcp",
      "headers": {
        "Authorization": "Bearer yourToken"
      }
    }
  }
}
After saving the file, restart Cursor. In Agent mode, Cursor can discover the NanoBanana tools and call them as part of the conversation. From the builder’s point of view, the interaction becomes a normal instruction: select or reference the relevant image, describe the change, and let the agent call the MCP tool.
Set up the project config
Create the file below in the root of the project where you want Cursor to use the image tools:
mkdir -p .cursor
cat > .cursor/mcp.json <<'JSON'
{
  "mcpServers": {
    "nanobanana": {
      "type": "http",
      "url": "https://nanobanana.mcp.acedata.cloud/mcp",
      "headers": {
        "Authorization": "Bearer yourToken"
      }
    }
  }
}
JSON
Replace yourToken with your Ace Data Cloud API token. The document describes one token being used across MCP servers, so you do not need a separate token just for this server. Keep the token out of source control; for a real project, treat .cursor/mcp.json like any other local configuration file that may contain credentials.
Use case 1: make a screenshot publishable
Terminal screenshots are often technically correct but visually rough. A common request from the document is:
Edit this image, add a rounded corner shadow window decoration,
and change the background to a light gray gradient.
This is a good first test because the desired transformation is constrained. You are not asking the model to invent a complex scene; you are asking it to preserve the screenshot content while improving the surrounding presentation. If the terminal text matters, say that explicitly in the prompt.
For repeatable work, keep a small prompt file in your repo:
from pathlib import Path

prompt = """
Use NanoBanana MCP to edit the selected screenshot:
- add a rounded-corner window frame
- add a soft shadow
- replace the background with a light gray gradient
- keep the terminal text readable
"""

Path("prompt.txt").write_text(prompt.strip(), encoding="utf-8")
Then paste that prompt into Cursor Agent mode when you attach or reference the screenshot. The important habit is to describe what must stay unchanged, not only what should be added.
Use case 2: compose two images
The document calls out multi-image composition as a practical scenario. The MCP edit tool can accept multiple image URLs, and the agent can use the relationship between those images in the prompt. A product mockup prompt might be:
Place the phone from the first image onto the desktop in the second image,
adjusting the size and perspective to make it look natural.
For this class of task, be specific about which image plays which role. “First image” as product and “second image” as background is a simple convention. Also state the physical constraints you care about: perspective, size, lighting, and whether the result should look like a natural photo or a stylized mockup.
Use case 3: generate small product illustrations
The same MCP setup also exposes nanobanana_generate_image. For example, the source document suggests an illustration request for a 404 page:
Generate an illustration of a small dinosaur lying next to a crack
in the broken ground looking down, to be used for a 404 page.
This kind of prompt is useful for product surfaces where you need a quick visual concept before deciding whether to refine it with a designer. In Cursor, it also means the illustration task can sit next to the route, component, or copy you are editing.
Other editor layouts
The Cursor example uses .cursor/mcp.json and the mcpServers format. The same document notes that VS Code uses .vscode/mcp.json with the configuration under servers. Claude Desktop uses a claude_desktop_config.json file, with paths differing by operating system. If you work across editors, keep the endpoint and authorization structure consistent, then adapt only the surrounding config shape.
Wrapping up
The nice part of MCP-based image editing is that it turns visual iteration into a tool call your coding agent can make while staying in context. Start with a low-risk screenshot polish task, then move to multi-image composition once you trust the loop. The full setup details and examples are in the Cursor Integration with NanoBanana MCP documentation.


Comments
Post a Comment