How to Build a Reliable Image Editing Workflow with GPT-Image-2
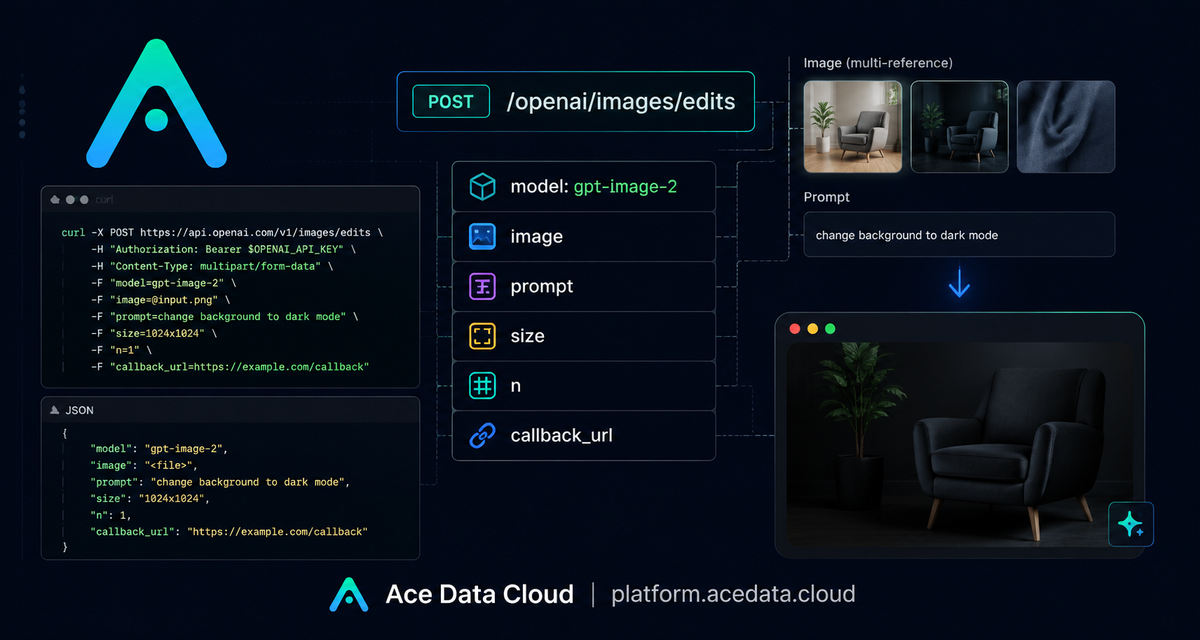
Image editing APIs are easy to demo, but harder to put into a production workflow: you need to keep the source structure stable, pass references cleanly, choose an output size intentionally, and avoid blocking your application while a render is running.
What you can do
The OpenAI Images Edits API on Ace Data Cloud exposes image editing through POST /openai/images/edits. The documented interface supports GPT Image models such as gpt-image-1 and gpt-image-2, plus the nano-banana family through the same editing endpoint. For this guide, we will focus on gpt-image-2, because the documentation describes it as stronger for structure preservation, text retention, direct URL input, base64 input, and high-resolution redrawing.
In practical terms, that makes it useful for builder tasks like:
- turning an existing infographic into a dark-mode version while keeping its layout intact;
- replacing the style or environment of a product image while preserving key object placement;
- combining multiple product references into one composed image;
- building a server-side image pipeline without first downloading every source image locally.
How it works
The core request is simple: send a source image, a natural-language prompt, and a model. With gpt-image-2, the image field can be a URL string, an array of image URLs, a base64 data URI such as data:image/png;base64,..., or raw base64. The GPT Image series can accept up to 16 reference images.
The size field controls the output dimensions. The documented validation allows auto, an empty value, or a string in WIDTHxHEIGHT format. Custom sizes must have width and height as multiples of 16, the long side must be no more than 3840, and the total pixel count must be no more than 8,294,400. If you omit size or pass auto, the output keeps the reference image aspect ratio. If you want a 16:9 blog cover or a 4:3 product card, specify the dimensions explicitly.
Start with JSON and image URLs
For backend applications, the cleanest path is application/json with a remote image URL. This avoids an extra download-and-upload step in your service. Here is a minimal call that converts an existing image into a dark-mode infographic while preserving its composition:
curl -X POST "https://api.acedata.cloud/openai/images/edits" \
  -H "Authorization: Bearer {token}" \
  -H "Content-Type: application/json" \
  -d '{
    "model": "gpt-image-2",
    "image": "https://platform.cdn.acedata.cloud/gpt-image/5c9fa635-8794-4c6d-88f8-584d7f4716c6_0.png",
    "prompt": "Convert this infographic to dark mode: dark navy background, light cream text, deep gray rounded module cards with soft shadows. Keep all layout, structure, and module arrangement identical — only invert the color scheme.",
    "size": "1024x1536"
  }'
The important part is not only the endpoint; it is the prompt discipline. Tell the model what should change, but also what must remain fixed: layout, structure, module arrangement, object counts, or text position.
Use multiple references when composition matters
The same image field can be an array. That is useful when your final output depends on more than one source: a product bundle, a moodboard-to-poster workflow, or a generated asset that must reuse several visual ingredients.
import requests

url = "https://api.acedata.cloud/openai/images/edits"
headers = {
    "accept": "application/json",
    "authorization": "Bearer {token}",
    "content-type": "application/json",
}
payload = {
    "model": "gpt-image-2",
    "image": [
        "https://example.com/item1.png",
        "https://example.com/item2.png",
        "https://example.com/item3.png",
    ],
    "prompt": "Combine all the items above into a single 'Relax & Unwind' gift basket on a clean white background, photorealistic, soft natural lighting.",
    "size": "1024x1024",
}

response = requests.post(url, json=payload, headers=headers)
print(response.text)
If you request more than one result, gpt-image-2 supports n values from 1 to 10. One caveat from the documentation: response_format=b64_json only supports n=1; for n > 1, use the default URL return.
Handle local files and SDK-compatible uploads
When your image is local, you have two documented options. You can encode it as base64 and put it in the JSON image field, or you can use the OpenAI SDK-style multipart/form-data upload. For SDK usage, set the OpenAI-compatible base URL to https://api.acedata.cloud/openai and use your Ace Data Cloud token as the API key, then call client.images.edit.
import base64
from openai import OpenAI

client = OpenAI()

result = client.images.edit(
    model="gpt-image-2",
    image=[open("test.png", "rb")],
    prompt="Convert this image to dark mode while keeping the layout intact."
)

image_base64 = result.data[0].b64_json
image_bytes = base64.b64decode(image_base64)
with open("edited.png", "wb") as f:
    f.write(image_bytes)
This path is convenient if you already have OpenAI-compatible image tooling and want to route it through Ace Data Cloud by changing the base URL and model.
Design for asynchronous completion
Image edits can take time. The documentation describes a callback_url mechanism: include callback_url in the request, receive an immediate response with a task_id, and later receive the edited-image result as a POST JSON payload to your callback endpoint. That lets your application store the task_id, return control to the user, and update the UI when the callback arrives instead of holding an HTTP connection open.
A production pattern is straightforward: validate the input image, submit the edit request with a deterministic internal job ID, store the returned task_id, and make your webhook idempotent. When the callback arrives, attach the returned data[].url to the job record and mark it complete.
A few practical defaults
- Use
gpt-image-2when preserving layout, readable text, or object arrangement matters. - Use URL-based JSON calls for server-side pipelines where the source image is already hosted.
- Specify
sizeexplicitly when the output has a target surface, such as1792x1024for a landscape asset or1024x1536for a portrait infographic. - Keep prompts concrete: describe what changes and what must not change.
The nice thing about this workflow is that it feels like normal API plumbing: a documented endpoint, explicit fields, JSON or multipart input, and predictable output URLs. Once that shape is in place, image editing becomes another step in your builder pipeline rather than a manual design task. For the complete parameter details and examples, read the OpenAI Images Edits API Integration Guide.


Comments
Post a Comment