How to Build an Image Editing Workflow with the OpenAI Images Edits API
If your app already stores product photos, UI screenshots, or generated artwork as URLs, the slow part of image editing is often not the model call itself. It is the glue code around downloading files, re-uploading them, keeping reference images aligned, and preserving layout while changing only the parts you intend to change.
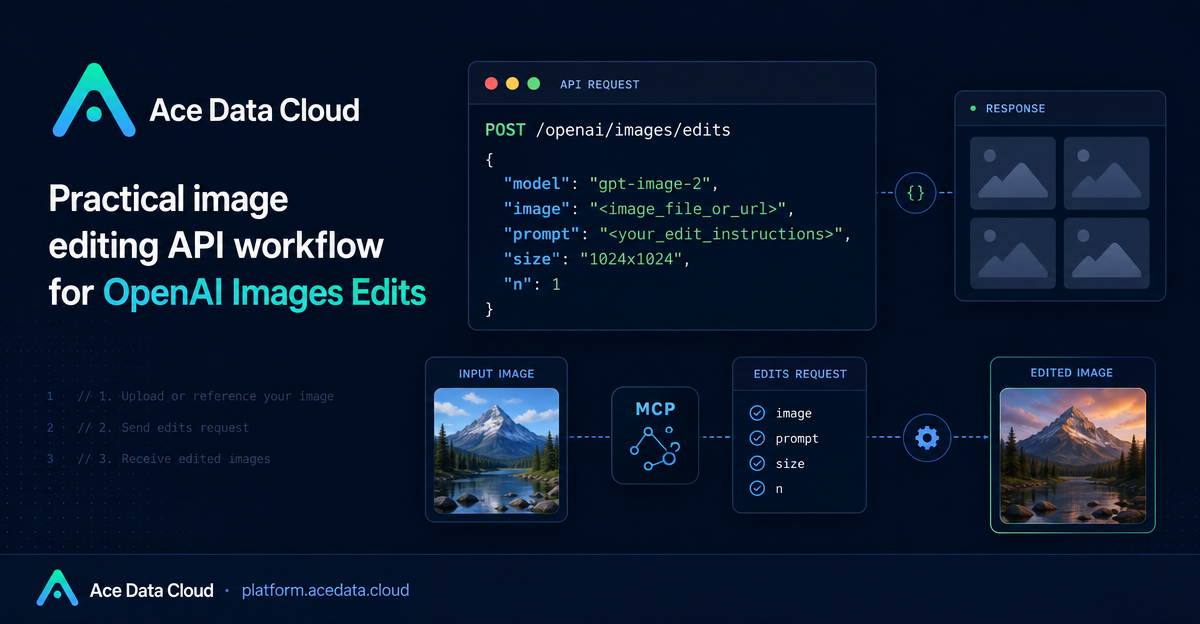
The OpenAI Images Edits API on Ace Data Cloud gives builders a practical way to send an image, a prompt, and a model choice to one editing endpoint. The most useful path for server-side workflows is the JSON request style supported by gpt-image-2, where the image field can be an image URL instead of a local multipart upload.
What you can do
The documented editing interface is built around https://api.acedata.cloud/openai/images/edits. With it, you can:
- Edit an existing image from a direct URL using
application/json. - Pass up to 16 reference images to GPT Image series models when a composition needs multiple inputs.
- Use
gpt-image-2for structure-preserving edits, text retention, direct URL input, base64 input, and higher-resolution redraws. - Control output dimensions with
size, including explicit values such as1024x1536,2048x1152, or3840x2160when they satisfy the documented custom-size rules. - Request multiple outputs with
nvalues from 1 to 10, while remembering thatresponse_format=b64_jsononly supportsn=1.
The same interface also exposes the nano-banana, nano-banana-2-lite, nano-banana-2, and nano-banana-pro model family for editing scenarios. Their supported parameter range is narrower: model, prompt, image, and n.
How it works
A typical request has three required ideas: choose a model, provide an image, and describe the desired edit in prompt. With gpt-image-2, the image value can be a URL, an array of URLs, a base64 string, or a data URL such as data:image/png;base64,.... That makes it friendly for backends where images already live in object storage or a CDN.
The response shown in the documentation includes fields such as success, task_id, trace_id, created, data, and elapsed. The edited image URL is returned inside data[].url. For production code, treat task_id and trace_id as useful identifiers for logging, retries, and support tickets.
Use JSON when your image is already online
For web apps, the cleanest integration is often JSON plus an image URL. You avoid temporary local files and make the edit request directly from your job runner, API route, or queue worker.
curl -X POST "https://api.acedata.cloud/openai/images/edits"   -H "Authorization: Bearer $ACEDATACLOUD_API_KEY"   -H "Content-Type: application/json"   -d '{
    "model": "gpt-image-2",
    "image": "https://example.com/source-image.png",
    "prompt": "Convert this infographic to dark mode: dark navy background, light cream text, deep gray rounded module cards with soft shadows. Keep all layout, structure, and module arrangement identical — only invert the color scheme.",
    "size": "1024x1536"
  }'
Notice how specific the prompt is. For editing, vague prompts tend to invite unnecessary changes. If layout matters, say so directly: keep the arrangement identical, preserve the number of objects, or only change the color scheme.
Use multiple references when one image is not enough
The GPT Image series models can accept multiple reference images through the same image field. In JSON, that means passing an array:
{
  "model": "gpt-image-2",
  "image": [
    "https://example.com/item1.png",
    "https://example.com/item2.png",
    "https://example.com/item3.png"
  ],
  "prompt": "Combine all the items above into a single 'Relax & Unwind' gift basket on a clean white background, photorealistic, soft natural lighting.",
  "size": "1024x1024"
}
This pattern is useful for catalog workflows: a merchant uploads several product cutouts, and your backend produces one composed merchandising image. The important constraint is to keep the reference count within the documented limit of 16 images for GPT Image series models.
Choose size deliberately
When size is omitted or set to auto, the output keeps the aspect ratio of the reference image. If you want to change the canvas shape, specify size explicitly. The documented custom-size rules for gpt-image-2 are strict: width and height must be multiples of 16, the long side must be no more than 3840, and total pixels must be no more than 8,294,400. Invalid formats return a 400 error.
That means a square avatar workflow might use 1024x1024, while a blog or landing-page hero can use a landscape value such as 1792x1024, 2048x1152, or 3840x2160, depending on your output target.
Use the OpenAI SDK path when you already have local files
If your existing pipeline already uses the OpenAI Python SDK and local file handles, the documented multipart-style flow still applies. Configure the base URL and API key, then call client.images.edit with model="gpt-image-2".
export OPENAI_BASE_URL=https://api.acedata.cloud/openai
export OPENAI_API_KEY=$ACEDATACLOUD_API_KEY
import base64
from openai import OpenAI
client = OpenAI()
result = client.images.edit(
model="gpt-image-2",
image=[open("test.png", "rb")],
prompt="Convert this image to dark mode while keeping the layout intact."
)
image_base64 = result.data[0].b64_json
image_bytes = base64.b64decode(image_base64)
with open("edited.png", "wb") as f:
f.write(image_bytes)For a builder, the decision is simple: use JSON when your source images are already addressable by URL or base64, and use multipart or the SDK when the files are already local.
Wrap-up
The useful part of this API is not only that it edits images. It is that it fits into real application workflows: CDN-hosted inputs, structured prompts, multiple references, explicit sizing, and predictable response fields for logging. Start with one narrow edit, verify that layout preservation works for your content type, then turn it into a repeatable job.
Read the full reference in the OpenAI Images Edits API Integration Guide.


Comments
Post a Comment