How to Build an Image Editing Pipeline with gpt-image-2
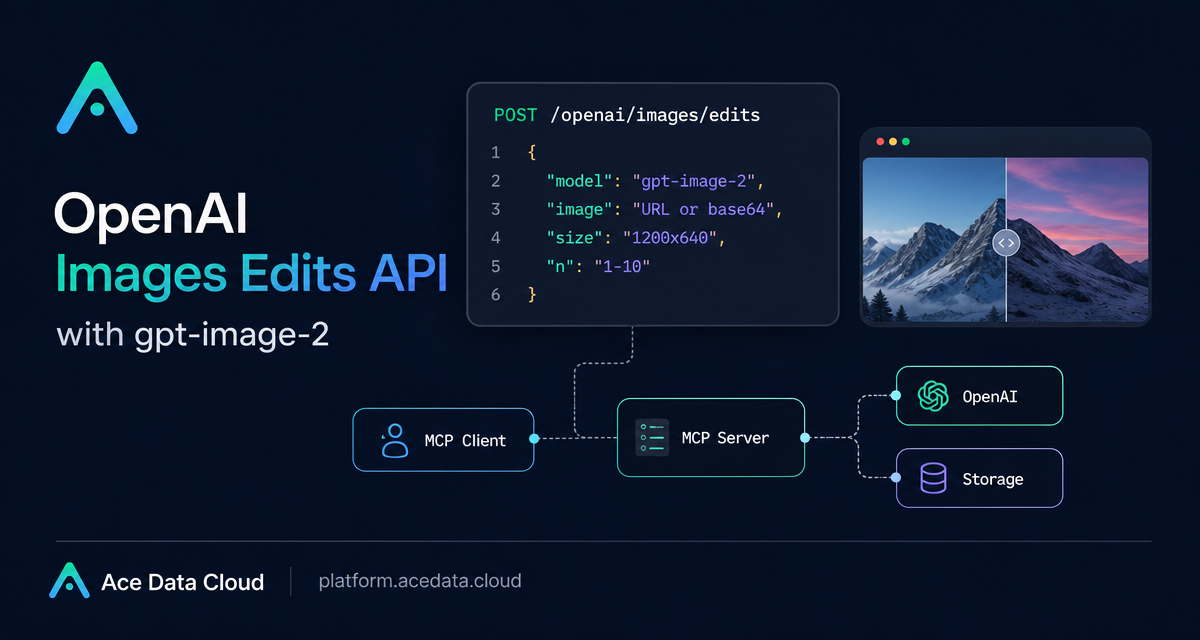
If you are building an app that transforms existing images, the hard part is not only image quality. The workflow also needs predictable inputs, preserved layout, usable output URLs, and enough control for a backend job to run without a human downloading files.
This guide shows a practical image editing pipeline with Ace Data Cloud's OpenAI Images Edits API and gpt-image-2. The goal is straightforward: receive a source image, pass it by URL or base64, describe the edit, and store the returned image URL with your own job record.
What you can do
The Images Edits API modifies one or more reference images with text instructions. The documented interface supports the GPT Image series, including gpt-image-1 and gpt-image-2. The same editing interface also supports Nano Banana models, but this tutorial focuses on gpt-image-2 because it is useful when structure and text retention matter.
- Edit an image from a direct URL using
application/json. - Pass local or private image bytes as base64 in the
imagefield. - Provide multiple references by making
imagean array, with up to 16 images. - Choose an output
sizeinWIDTHxHEIGHTformat, or useauto. - Request
nresults, from 1 to 10, when returning URLs.
How it works
The JSON endpoint for this workflow is:
POST https://api.acedata.cloud/openai/images/editsA minimal gpt-image-2 request includes model, image, and prompt. The image value may be a URL, a base64 string such as data:image/png;base64,..., or an array of image references. The response can include success, task_id, trace_id, created, data, and elapsed. Each item in data can include a result url and a revised_prompt.
Start with URL input
URL input is the cleanest approach when your assets already live in object storage or on a CDN. Your worker only needs the source URL and the editing instruction.
curl -X POST "https://api.acedata.cloud/openai/images/edits" \
  -H "Authorization: Bearer {token}" \
  -H "Content-Type: application/json" \
  -d '{
    "model": "gpt-image-2",
    "image": "https://platform.cdn.acedata.cloud/gpt-image/5c9fa635-8794-4c6d-88f8-584d7f4716c6_0.png",
    "prompt": "Convert this infographic to dark mode: dark navy background, light cream text, deep gray rounded module cards with soft shadows. Keep all layout, structure, and module arrangement identical — only invert the color scheme.",
    "size": "1024x1536"
  }'
The important part of the prompt is the boundary: say what should change and what must stay fixed. For design or documentation images, phrases like “keep layout, structure, and module arrangement identical” are more useful than a vague style request.
Use base64 for local or private images
When the input image should not be placed at a public URL, base64 input keeps the pipeline self-contained. The documented image field accepts either a data URL or raw base64.
import base64
import requests

with open("input.png", "rb") as f:
    b64 = base64.b64encode(f.read()).decode()

payload = {
    "model": "gpt-image-2",
    "image": f"data:image/png;base64,{b64}",
    "prompt": "Convert this infographic to dark mode.",
    "size": "1024x1536"
}

headers = {
    "authorization": "Bearer {token}",
    "content-type": "application/json"
}

response = requests.post(
    "https://api.acedata.cloud/openai/images/edits",
    json=payload,
    headers=headers,
)
print(response.text)
Handle size deliberately
The size field accepts auto, an empty value, or a value matching WIDTHxHEIGHT. For custom dimensions, both width and height must be multiples of 16, the long side must be no more than 3840, and the total pixel count must be no more than 8,294,400. Invalid values return a 400 error.
If size is omitted or auto, the result keeps the reference image aspect ratio. If you want to change the aspect ratio, provide the target dimensions explicitly. Documented examples include 1024x1024, 1024x1536, 1536x1024, 2048x1152, and 3840x2160.
Use multiple references and variations
For product bundles or visual composition, image can be an array. The GPT Image series supports up to 16 reference images.
payload = {
    "model": "gpt-image-2",
    "image": [
        "https://example.com/item1.png",
        "https://example.com/item2.png",
        "https://example.com/item3.png"
    ],
    "prompt": "Combine all the items above into a single 'Relax & Unwind' gift basket on a clean white background, photorealistic, soft natural lighting.",
    "size": "1024x1024"
}
The n field supports values from 1 to 10. One documented caveat: response_format=b64_json only supports n=1, so use URL output when requesting more than one result.
Use callbacks for long jobs
Image editing can take long enough that holding an HTTP connection open is not always ideal. The API supports an asynchronous flow with callback_url. The initial response includes task_id, and the completed result is posted back to your callback URL with the same task_id.
That makes the API fit naturally into a queue: enqueue the edit, persist task_id, receive the callback, then save data[].url into your application record.
A practical closing pattern
For a reliable builder workflow, validate the input image, choose URL or base64 transport, write prompts with preservation constraints, choose size intentionally, and store the returned data[].url. The product does not need to be the center of the experience; it can simply be the editing layer in your existing pipeline.
For the full reference, read the OpenAI Images Edits API integration guide.


Comments
Post a Comment