How to Build an Image Editing Pipeline with the OpenAI Images Edits API
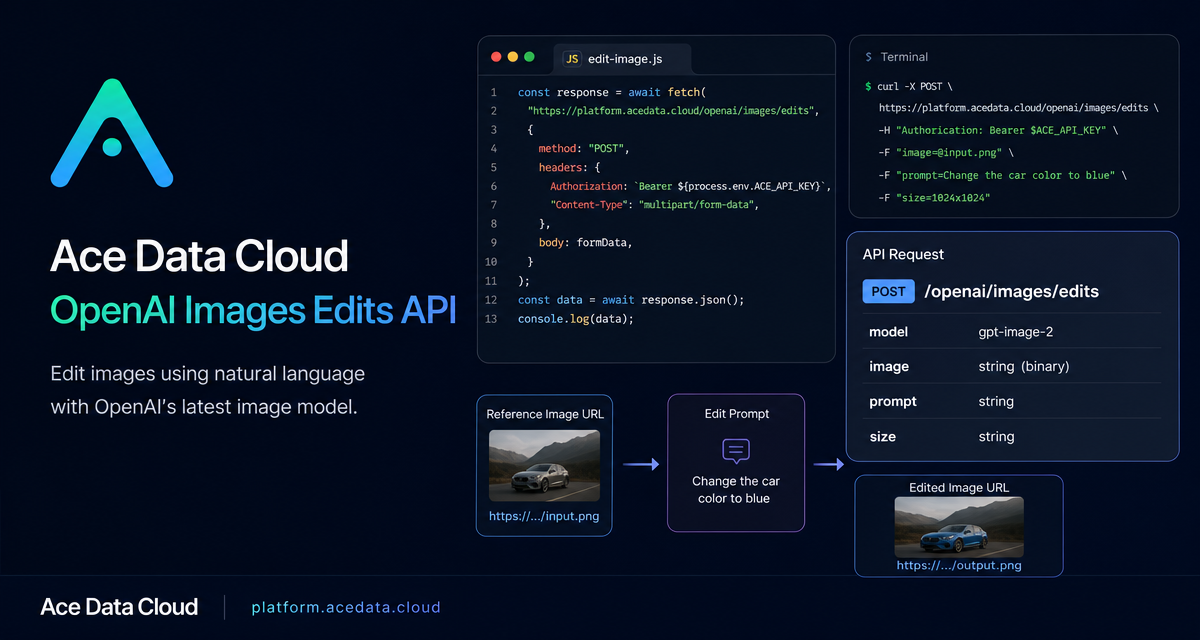
Image editing becomes much easier to automate when your application can pass an existing image, a precise instruction, and a target output size to one endpoint instead of building a custom graphics pipeline for every change.
What you can do
The OpenAI Images Edits API on Ace Data Cloud is designed for workflows where you already have one or more reference images and want to produce a modified result. Typical builder use cases include:
- Turning a product, infographic, or UI mockup into a different visual style while preserving structure.
- Passing an image URL directly from a server-side job without downloading and re-uploading the file.
- Using several reference images together, such as multiple product shots that should be combined into one composition.
- Running higher-resolution redraws by setting a concrete
sizevalue.
The same editing interface supports gpt-image-1, gpt-image-2, and the nano-banana model family. This guide focuses on gpt-image-2 because the source document highlights its stronger structure retention, text retention, URL input support, base64 input support, and high-resolution redraw behavior.
How it works
The core endpoint is:
POST https://api.acedata.cloud/openai/images/editsFor a JSON-based workflow, the important fields are model, image, prompt, and optionally size and n. The image field can be a single URL, an array of URLs, a data:image/png;base64,... value, or raw base64. The GPT Image series can accept up to 16 reference images at once.
The size field can be auto, omitted, or written as WIDTHxHEIGHT. For gpt-image-2, custom sizes must use widths and heights that are multiples of 16, the long side must be no more than 3840, and the total pixel count must be no more than 8,294,400. If you leave size as auto, the output keeps the reference image aspect ratio; if you want a new aspect ratio, set the size explicitly.
Start with JSON and an image URL
The most practical path for backend jobs is to send application/json and let the model fetch the reference image from a URL. That keeps the image editing step easy to queue from a CMS, asset pipeline, or internal admin tool.
curl -X POST "https://api.acedata.cloud/openai/images/edits"   -H "Authorization: Bearer {token}"   -H "Content-Type: application/json"   -d '{
    "model": "gpt-image-2",
    "image": "https://platform.cdn.acedata.cloud/gpt-image/5c9fa635-8794-4c6d-88f8-584d7f4716c6_0.png",
    "prompt": "Convert this infographic to dark mode: dark navy background, light cream text, deep gray rounded module cards with soft shadows. Keep all layout, structure, and module arrangement identical — only invert the color scheme.",
    "size": "1024x1536"
  }'
A successful response returns a data array with the edited image URL. The document also shows response fields such as success, task_id, trace_id, created, data[].revised_prompt, data[].url, and elapsed. In production, store the returned URL and task identifiers so you can connect generated assets back to the request that created them.
Use multiple reference images when the output depends on several inputs
When the edit is not a simple restyle, pass an array to image. For example, you can provide several product photos and ask for a single composed scene:
payload = {
    "model": "gpt-image-2",
    "image": [
        "https://example.com/item1.png",
        "https://example.com/item2.png",
        "https://example.com/item3.png"
    ],
    "prompt": "Combine all the items above into a single 'Relax & Unwind' gift basket on a clean white background, photorealistic, soft natural lighting.",
    "size": "1024x1024"
}
The important habit is to describe what must be preserved. If layout, object count, shelf arrangement, text, or brand placement matters, say so directly in the prompt. The source examples use instructions such as keeping the exact module arrangement or preserving the number of books on each shelf.
Choose size and n deliberately
Use auto for same-as-reference aspect ratio. Use explicit sizes when the delivery surface requires a specific canvas, such as 1024x1024, 2048x1152, or 3840x2160. The document lists recommended 1K, 2K, and 4K sizes across common ratios, but the validation rule is the key detail: WIDTHxHEIGHT, multiples of 16, long side at most 3840, and total pixels at most 8,294,400.
The n parameter can request multiple edited results, with values from 1 to 10. If you use response_format=b64_json, keep n=1; for n>1, use the default URL return.
Use the OpenAI SDK compatibility path when you already have files
If your code already uses the OpenAI Python SDK and local files, you can keep the multipart-style workflow and configure the base URL for Ace Data Cloud:
export OPENAI_BASE_URL=https://api.acedata.cloud/openai
export OPENAI_API_KEY={token}
import base64
from openai import OpenAI
client = OpenAI()
result = client.images.edit(
model="gpt-image-2",
image=[open("test.png", "rb")],
prompt="Convert this image to dark mode while keeping the layout intact."
)
image_base64 = result.data[0].b64_json
image_bytes = base64.b64decode(image_base64)
with open("edited.png", "wb") as f:
f.write(image_bytes)This is useful for local design tooling, desktop batch jobs, or CI tasks that already have images on disk. For web services, JSON plus image URLs is usually simpler.
When to add a callback
Image editing can take long enough that holding an HTTP connection open is not always ideal. The API supports an asynchronous callback flow by adding callback_url. The request returns a task_id, and when the task finishes, the edited result is sent to your callback endpoint as POST JSON that also includes the task_id. That makes it easier to build a queue worker, update a database row, and notify the user only after the final image URL is ready.
Closing notes
The best prompts for image editing are not flashy; they are specific. Name the parts that should change, name the parts that must stay fixed, and choose a size that matches where the asset will be used. With gpt-image-2, the practical workflow is straightforward: send a reference image, write an edit instruction, store the returned image URL, and keep the task metadata for traceability.
Read the full Ace Data Cloud guide here: OpenAI Images Edits API Integration Guide.


Comments
Post a Comment