How to Build an Image Editing Pipeline with GPT-Image-2
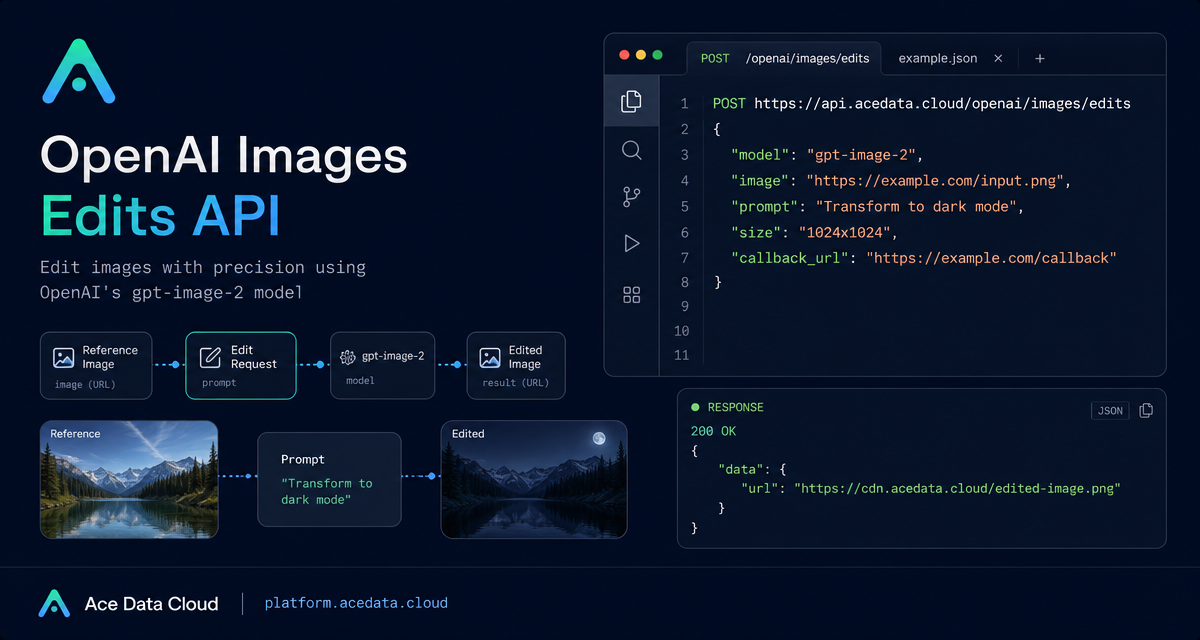
Image editing becomes much more useful when it fits into a developer workflow: take an existing asset, describe the change, preserve the parts that matter, and receive a new image that your app can store or publish.
What you can do
The OpenAI Images Edits API on Ace Data Cloud lets you send one or more reference images plus an instruction prompt, then receive edited image output. The same endpoint supports the GPT Image series and the Nano Banana family, but this guide focuses on gpt-image-2 because it is especially practical for server-side pipelines.
According to the integration guide, gpt-image-2 is designed for edits where structure should stay stable: changing colors, backgrounds, or visual style without damaging the original composition. It can also preserve text more accurately in assets such as infographics, posters, and menus.
- Edit an image directly from a public URL using JSON.
- Pass base64 image data when a local image should not be uploaded elsewhere first.
- Use up to 16 reference images in the
imagefield. - Request explicit output sizes such as
1024x1024,1792x1024,2048x1152, or3840x2160, as long as custom sizes satisfy the documented validation rules. - Use
callback_urlwhen a long-running edit should return immediately and post the result to your webhook later.
How it works
The core endpoint is:
POST https://api.acedata.cloud/openai/images/editsFor the JSON calling style, the important fields are model, image, prompt, and optionally size. The guide also notes that image may be a string URL, a base64 string such as data:image/png;base64,..., or an array such as ["url1", "url2", "url3"] when multiple reference images are needed.
A successful synchronous response follows the image API shape and includes fields such as success, task_id, trace_id, created, data, and elapsed. Each item in data can include a url for the edited image and a revised_prompt.
Start with URL-based editing
The simplest backend integration is JSON plus an image URL. This avoids downloading the source image locally just to upload it again.
curl -X POST "https://api.acedata.cloud/openai/images/edits" \
  -H "Authorization: Bearer {token}" \
  -H "Content-Type: application/json" \
  -d '{
    "model": "gpt-image-2",
    "image": "https://platform.cdn.acedata.cloud/gpt-image/5c9fa635-8794-4c6d-88f8-584d7f4716c6_0.png",
    "prompt": "Convert this infographic to dark mode: dark navy background, light cream text, deep gray rounded module cards with soft shadows. Keep all layout, structure, and module arrangement identical — only invert the color scheme.",
    "size": "1024x1536"
  }'
This pattern is useful for CMS tools, asset automation, marketplace images, and internal design review bots. The source image can live in your existing storage, while the edit request stays small and explicit.
Choose size deliberately
For gpt-image-2, the size value can be auto, empty, or a WIDTHxHEIGHT string. Custom sizes must have width and height that are multiples of 16, a long side no greater than 3840, and total pixels no greater than 8,294,400. If the value does not match the required format, the API returns a 400 error.
The guide gives recommended sizes by ratio. For example, 1024x1024, 2048x2048, and 2880x2880 are recommended 1:1 choices; 1792x1024, 2048x1152, and 3840x2160 are recommended 16:9 choices. If you omit size or pass auto, the output keeps the aspect ratio of the reference image.
Use multiple references for composition tasks
When the edit depends on several visual inputs, pass an array in image. The documentation states that GPT Image series models support up to 16 reference images. That makes the endpoint useful for product bundles, mood-board transformations, and layout-preserving design variants.
import requests

url = "https://api.acedata.cloud/openai/images/edits"
headers = {
    "accept": "application/json",
    "authorization": "Bearer {token}",
    "content-type": "application/json"
}
payload = {
    "model": "gpt-image-2",
    "image": [
        "https://example.com/item1.png",
        "https://example.com/item2.png",
        "https://example.com/item3.png"
    ],
    "prompt": "Combine all the items above into a single 'Relax & Unwind' gift basket on a clean white background, photorealistic, soft natural lighting.",
    "size": "1024x1024"
}

response = requests.post(url, json=payload, headers=headers)
print(response.text)
For prompts like this, be specific about what should change and what should remain fixed. If the layout matters, say so directly. If the number of objects matters, include the count in the prompt.
When to use callbacks
Image editing can take longer than a normal CRUD request. The guide describes an asynchronous callback flow: include a callback_url field in the request, receive a result containing task_id immediately, and later receive the edited image result as POST JSON at your callback URL. The returned callback payload also includes the task_id, so your system can associate the finished image with the original job.
A practical pattern is to store the request in your database with status queued, submit the edit with callback_url, update the row to processing with the returned task_id, and mark it ready when your webhook receives the final data[].url.
A note on Nano Banana models
The same edits endpoint also supports nano-banana, nano-banana-2-lite, nano-banana-2, and nano-banana-pro. The parameter range is different: the guide says the Nano Banana adaptation layer supports only model, prompt, image, and n. Parameters such as mask, size, and response_format are not supported and are ignored.
That difference matters when you build a reusable image-editing abstraction. Treat gpt-image-2 and Nano Banana as compatible at the endpoint level, but not identical at the parameter level.
Wrapping up
The useful mental model is simple: keep the endpoint stable, make the prompt explicit, choose size based on the target surface, and use callback_url when image generation should not block a request thread. With those pieces, image editing becomes a normal backend workflow rather than a manual design task.
Read the full integration guide here: OpenAI Images Edits API Integration Guide.


Comments
Post a Comment