How to Build an Image Editing Pipeline with GPT-Image-2
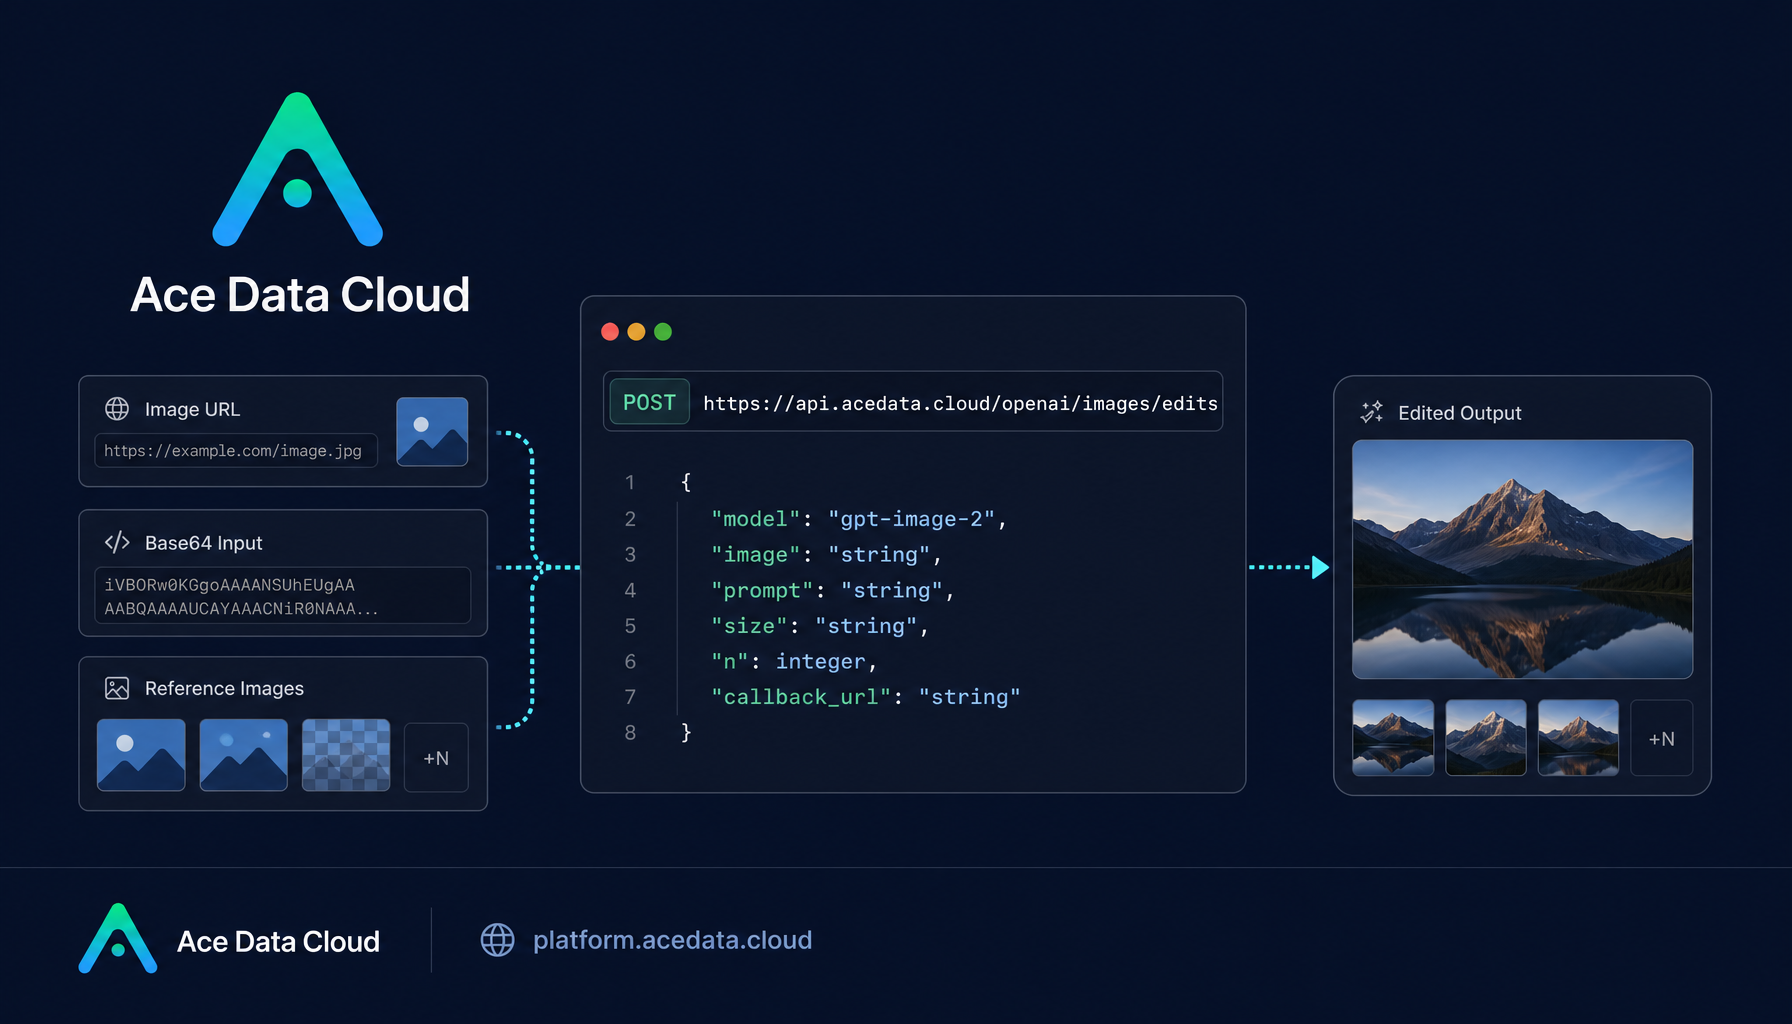
Image editing becomes much easier to automate when your pipeline can accept a source image, a precise instruction, and return a modified image without a manual design step.
What you can do
The OpenAI Images Edits API on Ace Data Cloud is useful when you want to modify existing visuals rather than generate a brand-new image from scratch. The documented endpoint is https://api.acedata.cloud/openai/images/edits, and the main workflow is simple: provide a model, one or more input images, a prompt describing the edit, and optional output controls such as size or n.
The practical use cases are the kinds of repetitive visual tasks builders often need in product and content systems:
- Convert an existing infographic into dark mode while preserving its structure.
- Change a product or room style while keeping the original composition stable.
- Combine several reference images into a single edited result.
- Run server-side image edits from image URLs or base64 inputs without a local download step.
How it works
For gpt-image-2, the API supports JSON requests where the image field can be a direct image URL. The same field can also accept base64 input, either as data:image/png;base64,... or raw base64. If you need several references, image can be an array, with up to 16 reference images.
The core fields you will usually care about are:
model: for example,gpt-image-2.image: a URL, a base64 string, or an array of image references.prompt: the edit instruction. Be explicit about what should change and what should remain fixed.size:auto, empty, or aWIDTHxHEIGHTvalue.n: number of edited results, from 1 to 10.callback_url: optional callback endpoint for asynchronous workflows.
Start with a structure-preserving edit
The easiest first test is a design transformation where the layout must remain the same. For example, ask the model to convert a light infographic into a dark navy version while keeping module placement, text layout, and visual hierarchy intact.
curl -X POST "https://api.acedata.cloud/openai/images/edits" \
  -H "Authorization: Bearer {token}" \
  -H "Content-Type: application/json" \
  -d '{
    "model": "gpt-image-2",
    "image": "https://platform.cdn.acedata.cloud/gpt-image/5c9fa635-8794-4c6d-88f8-584d7f4716c6_0.png",
    "prompt": "Convert this infographic to dark mode: dark navy background, light cream text, deep gray rounded module cards with soft shadows. Keep all layout, structure, and module arrangement identical — only invert the color scheme.",
    "size": "1024x1536"
  }'
A successful response contains a data array with an output url. The documented response also includes fields such as success, task_id, trace_id, created, and elapsed. In a production app, keep the task_id or trace_id in your job table so you can connect the generated asset back to the user action that requested it.
Use the size parameter intentionally
The size parameter is flexible, but it is still validated. For gpt-image-2, it must be auto, empty, or formatted as WIDTHxHEIGHT; other formats return a 400. Custom dimensions must have both width and height as multiples of 16, the long side must be no more than 3840, and total pixels must be no more than 8,294,400.
That means you can request common landscape or portrait outputs such as 1792x1024, 1024x1536, 2048x1152, or 3840x2160, as long as the dimensions fit the documented constraints. This is helpful when your application needs a final asset for a specific slot, such as a blog cover, a product card, or a vertical preview.
Pass multiple references when the prompt alone is not enough
When the target result depends on more than one visual input, pass an array in image. This is useful for workflows like combining separate product photos into one basket, keeping a brand logo visible while changing the background, or using one image as the base and another as style reference.
import requests

url = "https://api.acedata.cloud/openai/images/edits"
headers = {
    "authorization": "Bearer {token}",
    "content-type": "application/json"
}
payload = {
    "model": "gpt-image-2",
    "image": [
        "https://example.com/item1.png",
        "https://example.com/item2.png",
        "https://example.com/item3.png"
    ],
    "prompt": "Combine all the items above into a single 'Relax & Unwind' gift basket on a clean white background, photorealistic, soft natural lighting.",
    "size": "1024x1024",
    "n": 1
}

response = requests.post(url, json=payload, headers=headers)
print(response.text)
If you upload files through multipart/form-data, the GPT Image series supports multiple image uploads as repeated image[] fields. The documentation states that these reference images can be png, webp, or jpg, with each image not exceeding 50MB.
Handle longer edits with callbacks
Image edits can take long enough that keeping a request open is not always ideal. For background jobs, include callback_url. The API can return a task_id first, then POST the completed result to your callback endpoint when the edit is done. This pattern fits queues, content management systems, and internal tools where the user does not need to wait on a blocking HTTP request.
A clean production flow looks like this: create an edit job in your database, call the edits endpoint with a callback_url, store the returned task_id, and update the job when your callback receives the final JSON. Keep the original prompt and source image references too; they make debugging much easier when a user asks why a visual changed in a particular way.
Wrapping up
The important habit is to treat image editing as a deterministic workflow around a non-deterministic model: constrain the input, write prompts that separate “change this” from “preserve that,” validate size, and store task metadata. Once that is in place, gpt-image-2 becomes a practical building block for visual automation rather than a one-off design toy.
For the complete parameter details and examples, read the OpenAI Images Edits API Integration Guide.


Comments
Post a Comment