How to Add Nano Banana Image Tools to Claude Desktop, VS Code, and Cursor with MCP
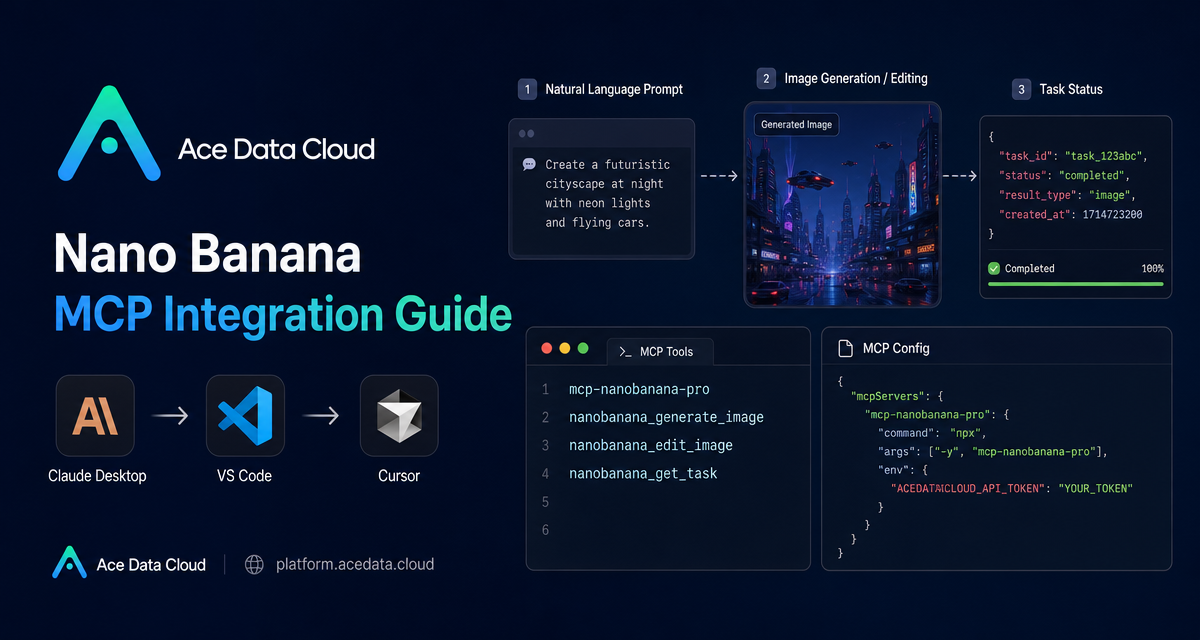
When an image workflow lives outside your editor, every iteration adds friction: copy a prompt, open another app, upload a reference image, wait for the result, then bring it back into your project. The practical value of MCP is that it lets an AI coding assistant call external tools directly from the place where you are already working.
This guide walks through setting up the Nano Banana MCP Server from Ace Data Cloud so that clients such as Claude Desktop, VS Code, and Cursor can generate images, edit existing images, combine multiple images, run virtual try-on tasks, place products into scenes, and query task status through a small set of MCP tools.
What you can do
The Nano Banana MCP Server is documented as an image generation and editing bridge for AI clients. Once configured, your assistant can use natural language to call tools for tasks such as:
- Generating high-quality images from text prompts.
- Editing an existing image or combining multiple images.
- Trying clothing on a person in a photo.
- Placing a product into a real-world scene, such as a café.
- Monitoring image tasks until the output is ready.
The supported model names in the guide are nano-banana, nano-banana-2, and nano-banana-pro. That matters because the MCP layer is not just a generic image button; it exposes named tools that your client can call in a repeatable workflow.
How it works
MCP, or Model Context Protocol, gives AI clients a standard way to call external tools. In this setup, the client starts a local command named mcp-nanobanana-pro. That command runs the Nano Banana MCP Server, and the server reads your Ace Data Cloud API token from the environment variable ACEDATACLOUD_API_TOKEN.
From there, the client can discover and call the Nano Banana tools. The documented tool list is intentionally small:
nanobanana_generate_image— generate images from text prompts.nanobanana_edit_image— edit or combine existing images.nanobanana_get_task— query the status of a single task.nanobanana_get_tasks_batch— query multiple task statuses.
This shape is useful for builder workflows. A coding assistant can help draft the prompt, call generation or editing, then check the task result without making you switch contexts.
Install the MCP server
The recommended installation path in the guide is a Python package install:
pip install mcp-nanobanana-proIf you prefer working from source, the documented alternative is:
git clone https://github.com/AceDataCloud/NanoBananaMCP.git
cd NanoBananaMCP
pip install -e .
After installation, the command you wire into your MCP client is mcp-nanobanana-pro. Keep the API token outside your prompt text and store it in the client configuration as an environment variable.
Configure Claude Desktop
Claude Desktop reads MCP server configuration from different paths depending on the operating system. The guide lists these locations:
- macOS:
~/Library/Application Support/Claude/claude_desktop_config.json - Windows:
%APPDATA%\Claude\claude_desktop_config.json
Add a server entry like this:
{
  "mcpServers": {
    "nanobanana": {
      "command": "mcp-nanobanana-pro",
      "env": {
        "ACEDATACLOUD_API_TOKEN": "Your API Token"
      }
    }
  }
}
If you use uvx and do not want to install the package in advance, the documented configuration is:
{
  "mcpServers": {
    "nanobanana": {
      "command": "uvx",
      "args": ["mcp-nanobanana-pro"],
      "env": {
        "ACEDATACLOUD_API_TOKEN": "Your API Token"
      }
    }
  }
}
After saving the file, restart Claude Desktop so it can load the MCP server.
Configure VS Code or Cursor
For VS Code and Cursor, create .vscode/mcp.json in the project root. The direct command configuration is:
{
  "servers": {
    "nanobanana": {
      "command": "mcp-nanobanana-pro",
      "env": {
        "ACEDATACLOUD_API_TOKEN": "Your API Token"
      }
    }
  }
}
The uvx version follows the same pattern, but uses command plus args:
{
  "servers": {
    "nanobanana": {
      "command": "uvx",
      "args": ["mcp-nanobanana-pro"],
      "env": {
        "ACEDATACLOUD_API_TOKEN": "Your API Token"
      }
    }
  }
}
This project-level setup is handy when image work is tied to a codebase: a landing page hero, a product screenshot variation, a visual prototype, or a content asset that belongs beside the app source.
A practical workflow
Once the server is configured, you can ask the AI client for image tasks in plain language. The documentation gives examples such as generating a watercolor landscape, placing clothing onto a person, putting a product into a café scene, or generating a portrait with nano-banana-pro.
A realistic builder loop might look like this:
- Describe the asset you need in the chat.
- Ask the assistant to use
nanobanana_generate_imagefor the first draft. - If you have a reference image, ask it to use
nanobanana_edit_imageto adjust or combine images. - Use
nanobanana_get_taskornanobanana_get_tasks_batchto check progress and collect results.
The important part is not that the model writes a beautiful prompt in one shot. It is that the prompt, tool call, edit request, and result check can stay inside the same assistant session.
Closing notes
If you already use Claude Desktop, VS Code, or Cursor as part of your daily workflow, Nano Banana MCP is a clean way to move image generation and editing closer to where decisions are made. Start with the minimal configuration, verify that the server appears in your client, then build a small repeatable workflow around the four documented tools.
For the source setup details and the latest configuration examples, read the Nano Banana MCP Integration Guide.


Comments
Post a Comment