How to Add Nano Banana Image Editing to Claude Desktop, VS Code, and Cursor with MCP
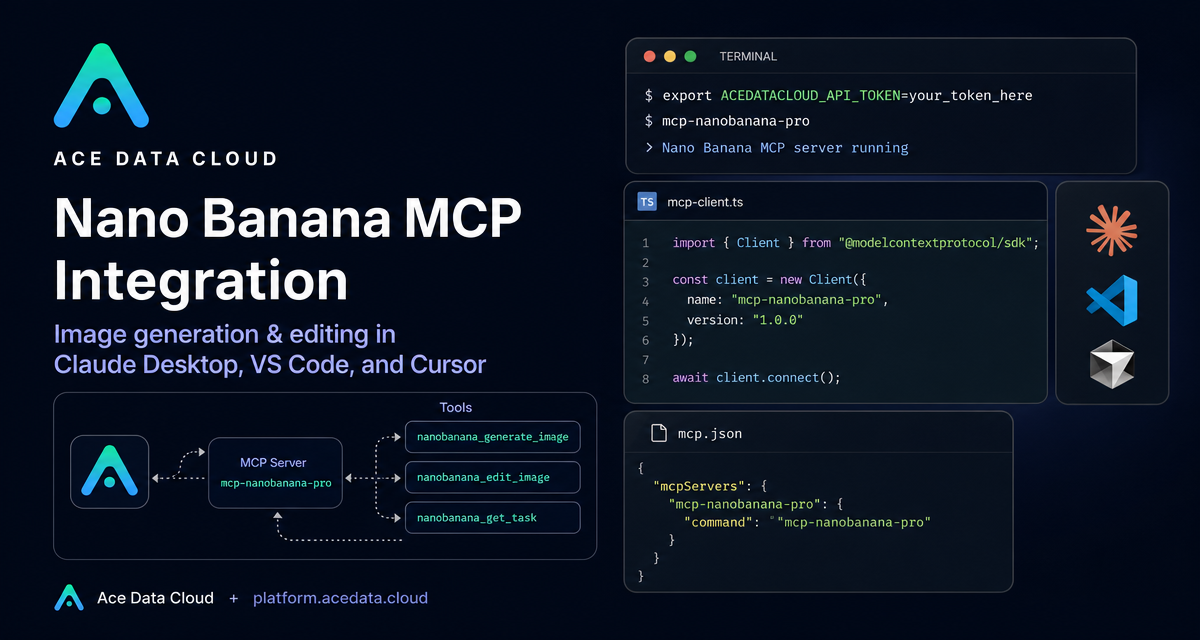
If your image workflow keeps bouncing between an AI chat, a browser tab, and a separate image tool, an MCP server gives you a cleaner path: keep the conversation where you are already building, and let the assistant call image tools through a standard interface.
What you can do
The Nano Banana MCP Server from Ace Data Cloud is designed for AI clients such as Claude Desktop, VS Code, and Cursor. Once configured, the assistant can help with practical image tasks directly from the chat or editor workflow:
- Generate images from text prompts.
- Edit or combine existing images.
- Run virtual try-on workflows, such as placing clothing on a photo of a person.
- Place a product into a real-world scene.
- Use supported models including
nano-banana,nano-banana-2, andnano-banana-pro. - Query task progress and retrieve results after generation starts.
The important part is not just that these are image features. It is that they become callable tools inside the environment where you describe the change, inspect the result, and iterate.
How it works
MCP, or Model Context Protocol, lets an AI client connect to external tools through a standardized server interface. In this setup, your local AI client starts the Nano Banana MCP server using the mcp-nanobanana-pro command. The server receives tool calls from the client and uses your Ace Data Cloud API token through the ACEDATACLOUD_API_TOKEN environment variable.
The document lists four available tools:
nanobanana_generate_imagefor generating images from text prompts.nanobanana_edit_imagefor editing or combining existing images.nanobanana_get_taskfor querying the status of a single task.nanobanana_get_tasks_batchfor querying multiple task statuses at once.
That tool boundary is useful for builders. You can keep your prompt and project context in Claude Desktop, VS Code, or Cursor, while delegating image generation and editing to the MCP server instead of manually copying prompts into a separate UI.
Install the MCP server
The recommended installation path is pip:
pip install mcp-nanobanana-proIf you prefer to work from source, the documented source installation uses the GitHub repository and an editable install:
git clone https://github.com/AceDataCloud/NanoBananaMCP.git
cd NanoBananaMCP
pip install -e .
After installation, the server can be started with the mcp-nanobanana-pro command. You normally do not run it manually for everyday use; the AI client starts it from its MCP configuration.
Configure Claude Desktop
For Claude Desktop, edit the configuration file for your operating system. On macOS, the path is ~/Library/Application Support/Claude/claude_desktop_config.json. On Windows, it is %APPDATA%\Claude\claude_desktop_config.json.
Add a server entry under mcpServers:
{
  "mcpServers": {
    "nanobanana": {
      "command": "mcp-nanobanana-pro",
      "env": {
        "ACEDATACLOUD_API_TOKEN": "Your API Token"
      }
    }
  }
}
If you do not want to install the package ahead of time, the documented alternative is to use uvx:
{
  "mcpServers": {
    "nanobanana": {
      "command": "uvx",
      "args": ["mcp-nanobanana-pro"],
      "env": {
        "ACEDATACLOUD_API_TOKEN": "Your API Token"
      }
    }
  }
}
Save the file and restart Claude Desktop. After the restart, Nano Banana tools should be available in conversation.
Configure VS Code or Cursor
For VS Code or Cursor, create .vscode/mcp.json in your project root. The configuration shape is slightly different: the top-level key is servers instead of mcpServers.
{
  "servers": {
    "nanobanana": {
      "command": "mcp-nanobanana-pro",
      "env": {
        "ACEDATACLOUD_API_TOKEN": "Your API Token"
      }
    }
  }
}
The uvx version is also supported here:
{
  "servers": {
    "nanobanana": {
      "command": "uvx",
      "args": ["mcp-nanobanana-pro"],
      "env": {
        "ACEDATACLOUD_API_TOKEN": "Your API Token"
      }
    }
  }
}
This is the setup I would use for product or frontend work: keep the prompt next to the codebase, ask the assistant to create a hero image, product mockup, or edited asset, then iterate without leaving the editor.
Try a first workflow
Once the MCP server is connected, you can ask in natural language. The source guide gives examples such as generating a watercolor landscape painting, photoshopping clothing onto a person, placing a product in a café scene, or generating a high-quality portrait with the nano-banana-pro model.
A builder-friendly first test might be:
Generate a clean product placement image for this bottle in a café scene.
Use a realistic style and keep the product label readable.
Behind the scenes, the client can route this to the relevant Nano Banana tool. If the operation is asynchronous, use the task query tools, such as nanobanana_get_task or nanobanana_get_tasks_batch, to monitor progress and retrieve the result.
Practical notes
- Keep your API token in the
envblock. Do not paste it into prompts or source files that will be committed. - Use
nano-banana-proonly when the task needs the higher-quality model path described by the guide; otherwise start simple and iterate. - For editor usage, commit a template
.vscode/mcp.jsonwithout the real token, then let each developer set their own environment value. - Use task querying when you build repeatable workflows, because image generation and editing are naturally task-oriented.
Nano Banana MCP is a good fit when image generation is part of a builder loop rather than a one-off prompt. You describe the intent, the assistant calls a focused tool, and your project context stays intact. For the complete configuration reference, read the Nano Banana MCP Integration Guide.


Comments
Post a Comment