Getting Started with Nano Banana MCP for Image Generation in Your AI Client
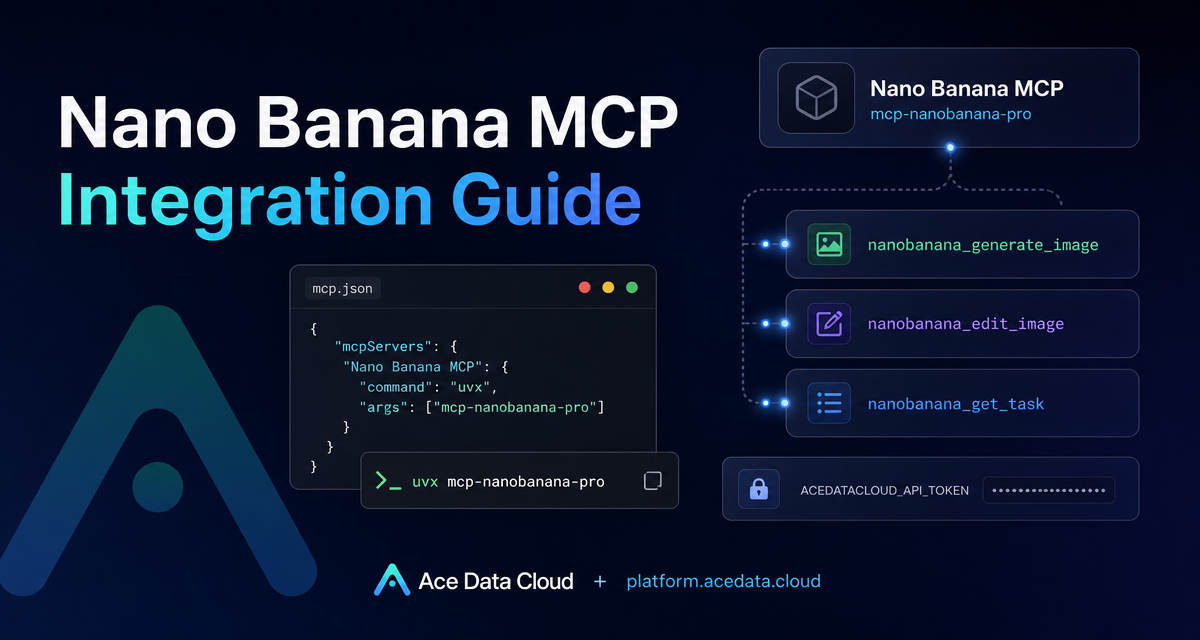
When you are building with AI image tools, the slow part is often not the model itself. It is the context switching: copy a prompt from your editor, open a separate image tool, upload references, wait for a task, then bring the result back into your workflow. Nano Banana MCP is useful because it lets an AI client call image generation and editing tools directly through the Model Context Protocol.
This guide walks through the practical setup described in the Ace Data Cloud Nano Banana MCP documentation: installing the MCP server, wiring it into Claude Desktop or an IDE such as VS Code or Cursor, and using the available tools for generation, editing, try-on, product placement, and task tracking.
What you can do
The Nano Banana MCP Server exposes image capabilities to MCP-compatible clients. Once configured, your assistant can call tools instead of only describing the image operation in text.
- Image generation: create images from text prompts.
- Image editing: modify existing images or combine multiple images.
- Virtual try-on: place clothing onto photos of people.
- Product placement: put a product into a real scene.
- Multi-model selection: use
nano-banana,nano-banana-2, ornano-banana-pro. - Task querying: monitor generation progress and retrieve results.
That combination is especially helpful when the image operation is part of a larger workflow: writing product copy, creating social assets, preparing mockups, or iterating on UI imagery inside a project folder.
How it works
MCP, or Model Context Protocol, gives AI clients a standardized way to call external tools. In this case, the client starts a local command called mcp-nanobanana-pro. The server receives tool calls from the AI client and uses an Ace Data Cloud API token supplied through the ACEDATACLOUD_API_TOKEN environment variable.
The important architectural point is that your AI client does not need a custom integration for every image action. It only needs to understand MCP. The Nano Banana MCP server then provides a small set of focused tools:
nanobanana_generate_imagefor text-to-image generation.nanobanana_edit_imagefor editing or combining images.nanobanana_get_taskfor checking one task.nanobanana_get_tasks_batchfor checking multiple tasks.
Install the MCP server
The recommended installation path is a normal Python package install:
pip install mcp-nanobanana-proIf you prefer working from source, the documentation also shows a repository-based setup:
git clone https://github.com/AceDataCloud/NanoBananaMCP.git
cd NanoBananaMCP
pip install -e .
After installation, the server can be started with the mcp-nanobanana-pro command. In most client setups, you do not run it manually; the client launches it from its MCP configuration.
Configure Claude Desktop
For Claude Desktop, edit the configuration file for your operating system:
- macOS:
~/Library/Application Support/Claude/claude_desktop_config.json - Windows:
%APPDATA%\Claude\claude_desktop_config.json
Add a server entry named nanobanana and pass your token through the environment:
{
  "mcpServers": {
    "nanobanana": {
      "command": "mcp-nanobanana-pro",
      "env": {
        "ACEDATACLOUD_API_TOKEN": "Your API Token"
      }
    }
  }
}
If you want the client to run the package through uvx without installing it in advance, use this variant:
{
  "mcpServers": {
    "nanobanana": {
      "command": "uvx",
      "args": ["mcp-nanobanana-pro"],
      "env": {
        "ACEDATACLOUD_API_TOKEN": "Your API Token"
      }
    }
  }
}
After saving the file, restart Claude Desktop so it reloads the MCP configuration.
Configure VS Code or Cursor
For VS Code or Cursor, create .vscode/mcp.json in your project root. The structure is slightly different: the top-level key is servers instead of mcpServers.
{
  "servers": {
    "nanobanana": {
      "command": "mcp-nanobanana-pro",
      "env": {
        "ACEDATACLOUD_API_TOKEN": "Your API Token"
      }
    }
  }
}
The uvx form works here as well:
{
  "servers": {
    "nanobanana": {
      "command": "uvx",
      "args": ["mcp-nanobanana-pro"],
      "env": {
        "ACEDATACLOUD_API_TOKEN": "Your API Token"
      }
    }
  }
}
This setup is convenient for builder workflows because the image tools live beside the codebase. You can ask the assistant to create a product scene, edit a mockup, or generate a portrait while it still has the project context open.
Try practical prompts
The MCP server is usually invoked through natural language in the AI client. The documentation gives examples such as asking the assistant to generate a watercolor landscape, place clothing onto a person, put a product in a café scene, or generate a high-quality portrait with the nano-banana-pro model.
For a more structured workflow, I like to describe the task in three parts: the source material, the transformation, and the result I want back. For example: “Use the product image I uploaded, place it in a café scene, keep the packaging readable, and return the final image when the task completes.” The assistant can then choose the editing or generation tool and follow up with nanobanana_get_task if the operation is asynchronous.
Common setup checks
- Make sure the command name is exactly
mcp-nanobanana-prowhen using the installed package. - Use
uvxwithargsset to["mcp-nanobanana-pro"]if you do not want to preinstall the package. - Keep the token in
ACEDATACLOUD_API_TOKEN; do not paste it into prompts. - Restart the client after editing the MCP configuration.
- Use
nanobanana_get_taskornanobanana_get_tasks_batchwhen you need to inspect progress and retrieve results.
Where to go next
Nano Banana MCP is a good fit when image generation is not a one-off task but part of a builder loop: design, inspect, edit, and repeat without leaving the AI client. Start with a small prompt, confirm that the MCP server appears in your client, and then move to richer cases like product placement or multi-image editing.
For the exact setup reference, see the Nano Banana MCP Integration Guide.


Comments
Post a Comment