Getting Started with Codex CLI and Ace Data Cloud in Your Terminal
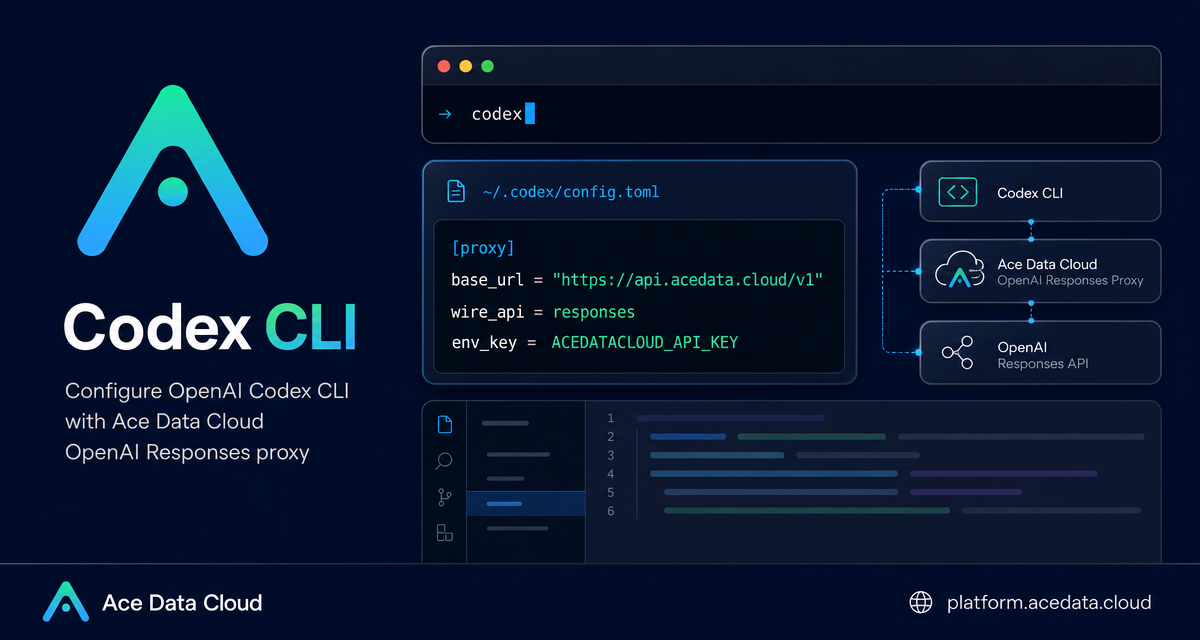
When a coding agent runs in your terminal, the useful part is not the chat UI itself; it is how quickly it can read a project, reason about the code, run commands, and help you move without breaking your normal workflow.
This guide walks through a practical setup for using Codex CLI with Ace Data Cloud as an OpenAI Responses-compatible provider. The goal is simple: keep the native codex terminal experience, but point its model requests at https://api.acedata.cloud/v1 through Codex's custom provider configuration.
What you can do
Codex CLI is a local programming agent that runs from the terminal. Once configured, it can help with everyday development work such as:
- Reading and explaining an unfamiliar project structure.
- Inspecting source files and suggesting changes.
- Running shell commands during a debugging session.
- Helping with small refactors, error explanations, and code review tasks.
The Ace Data Cloud configuration does not require a separate local proxy process or a Codex plugin. Codex already supports custom model providers, and its Responses API wire format can be routed to Ace Data Cloud by editing ~/.codex/config.toml.
How it works
The important pieces are Codex's global configuration file, one environment variable, and the Responses API endpoint.
- Codex reads
model_providerfrom~/.codex/config.toml. - It loads the matching provider block, in this case
[model_providers.acedatacloud]. - It reads your API token from the environment variable named by
env_key. - Because
wire_api = "responses", requests go tobase_url + /responses, which becomeshttps://api.acedata.cloud/v1/responses. - Ace Data Cloud verifies the token, checks quota, forwards the request to an available upstream model channel, and records usage after completion.
From the developer's point of view, the command stays the same: you still run codex inside a project directory.
Install Codex CLI
If you already have Node.js 18 or higher, install Codex CLI with npm:
npm install -g @openai/codexOn macOS, the documented Homebrew option is:
brew install --cask codexAfter installation, reopen your terminal and verify the command is available:
codex --versionIf your shell returns command not found, the current terminal likely has not loaded the new PATH. Reopen the terminal or check the path instructions printed by the installer.
Use one authentication method
The source documentation makes one point worth treating as a rule: choose one authentication method and do not mix them. This guide uses env_key = "ACEDATACLOUD_API_KEY", which means Codex reads the token only from an environment variable.
Add the variable to your shell configuration file, such as ~/.zshrc, ~/.bashrc, or ~/.bash_profile:
export ACEDATACLOUD_API_KEY="{token}"Replace {token} with your Ace Data Cloud API token. Then reload the shell configuration:
source ~/.zshrcWhen checking whether the variable exists, avoid printing the token itself. Use a presence check instead:
test -n "$ACEDATACLOUD_API_KEY" && echo "ACEDATACLOUD_API_KEY is set" || echo "ACEDATACLOUD_API_KEY is missing"Configure the provider
Codex stores its global configuration at ~/.codex/config.toml. Create the directory and file if they do not already exist:
mkdir -p ~/.codex
touch ~/.codex/config.toml
Then write the provider configuration:
model_provider = "acedatacloud"
model = "gpt-5"
model_reasoning_effort = "high"

[model_providers.acedatacloud]
name = "Ace Data Cloud"
base_url = "https://api.acedata.cloud/v1"
env_key = "ACEDATACLOUD_API_KEY"
wire_api = "responses"
Each field has a specific job. model_provider selects the default provider. model selects the default model. model_reasoning_effort accepts common values such as low, medium, and high. The provider block defines the display name, the Ace Data Cloud base URL, the environment variable Codex should read, and the required responses wire protocol.
Clear cached OpenAI login state
If you previously logged in to Codex CLI with an official OpenAI account, Codex may have cached local auth state in ~/.codex/auth.json. Before switching to this environment-variable configuration, clear the old login:
codex logoutIf that command is unavailable, remove the cache file directly:
rm -f ~/.codex/auth.jsonIf you have never used an official OpenAI login with Codex, you can skip this step.
Start and verify a session
Move into a project and start Codex:
cd /path/to/your/project
codex
Inside the interactive interface, you can ask something small first:
Explain the directory structure of this projectTo verify which provider is active, run:
/modelThe expected result should show a model such as gpt-5 and the provider as acedatacloud. If it does not, check that model_provider = "acedatacloud" exactly matches [model_providers.acedatacloud], confirm the environment variable is set without printing the token, clear any old auth.json, and fully restart your terminal or editor window.
For a minimal non-interactive validation, the documentation suggests:
codex exec --model gpt-5-mini "Reply with exactly: ADC_Codex_OK" < /dev/nullChoosing a model and project trust
The default model in config.toml can be changed when your workflow changes. The documented examples include gpt-5, gpt-5-mini, gpt-5.6-sol, gpt-5.6-terra, gpt-5.6-luna, gpt-5.5, gpt-5.5-pro, gpt-4.1, o3, and o4-mini. You can temporarily override the model from the command line:
codex --model gpt-5-miniCodex also supports per-project trust levels. For a known repository, you may mark it trusted; for an unfamiliar checkout, keep it untrusted:
[projects."/path/to/trusted/project"]
trust_level = "trusted"

[projects."/path/to/untrusted/project"]
trust_level = "untrusted"
This is a small configuration detail, but it matters. A terminal coding agent is most useful when it has enough permission to help, and safest when that permission is scoped to the project you actually trust.
Wrap-up
The setup is mostly plumbing: install Codex CLI, store the token in ACEDATACLOUD_API_KEY, configure ~/.codex/config.toml, clear conflicting auth state, and verify with /model or a minimal codex exec command. After that, the day-to-day workflow is still the native codex command in your terminal.
Read the original Ace Data Cloud documentation here: Codex CLI Terminal User Guide.


Comments
Post a Comment