A Practical Guide to Running Claude Code in JetBrains IDEs
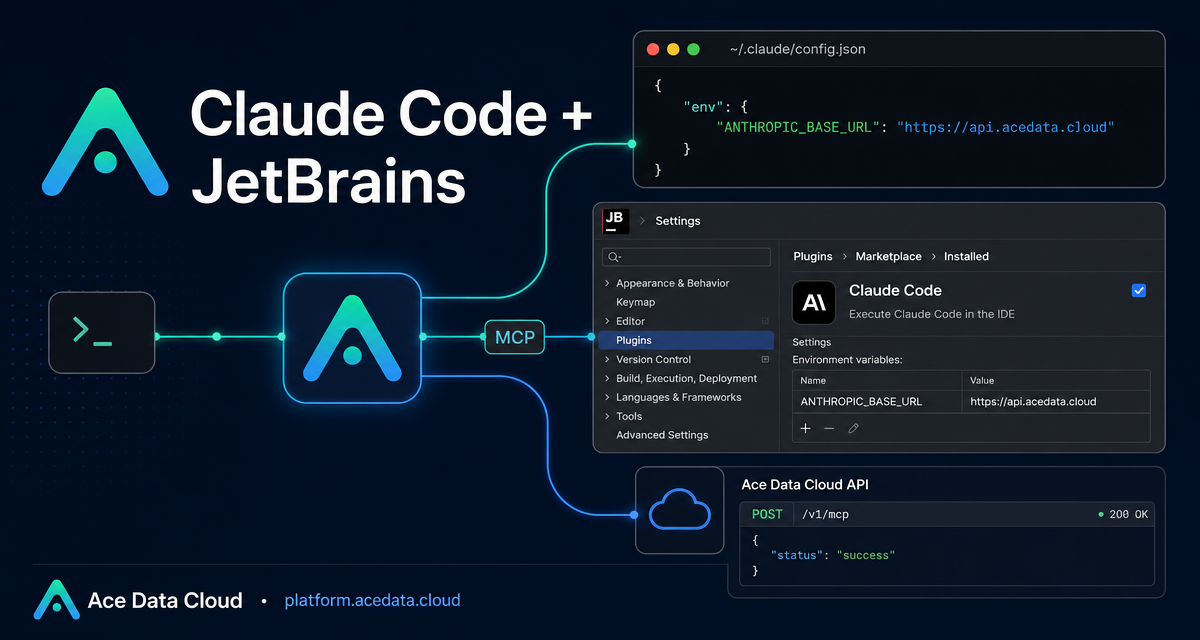
When an AI coding assistant lives outside your editor, every useful change can turn into a copy-paste loop: ask in a terminal, inspect files in the IDE, apply diffs manually, then repeat. The Claude Code JetBrains plugin closes that gap by letting you run claude from the same project context while keeping JetBrains-native features such as diffs, selected code, open tabs, and diagnostics in the workflow.
What you can do
With the JetBrains integration configured, you can use Claude Code from IDEs such as IntelliJ IDEA, PyCharm, WebStorm, GoLand, PhpStorm, and Android Studio. The workflow is especially useful when you want an agentic coding session that can reason about the same files you are editing, then show code changes in the IDE instead of forcing you to reconstruct patches by hand.
The integration supports several practical behaviors:
- Diff view: code changes are displayed in the IDE’s Diff viewer.
- Context selection: selected code and the current tab can be shared with Claude automatically.
- File references: shortcuts can insert references such as
@File#L1-99. - Diagnostic sharing: lint, syntax, and similar IDE diagnostics can be shared with the assistant.
How it works
The important detail is that the JetBrains plugin depends on the Claude Code CLI. The plugin runs the claude command through the IDE’s integrated terminal, so the proxy configuration is the same shape as the CLI configuration: create the Claude Code config file, then point Claude Code at Ace Data Cloud with environment variables.
The two core variables are ANTHROPIC_AUTH_TOKEN and ANTHROPIC_BASE_URL. The token comes from your Ace Data Cloud console, and the base URL is https://api.acedata.cloud. No separate JetBrains-only endpoint is needed; the IDE flow inherits the same command-line configuration.
Install the CLI and plugin
Start with the Claude Code CLI. On macOS, Linux, or WSL, the documented install command is:
curl -fsSL https://claude.ai/install.sh | bashIf you use Homebrew, the alternative is:
brew install claude-codeAfter installation, verify that the command is available:
claude --versionThen open your JetBrains IDE and install the plugin from Settings → Plugins → Marketplace by searching for Claude Code. After installation, restart the IDE completely. The source guide notes that more than one restart may be needed before the plugin is detected correctly.
Configure Claude Code for Ace Data Cloud
First, create the Claude Code config file. On macOS and Linux the path is ~/.claude/config.json. On Windows it is C:\Users\{username}\.claude\config.json. The file content is intentionally small:
{
  "primaryApiKey": "self"
}
On macOS or Linux, you can create it with:
mkdir -p ~/.claude && echo '{"primaryApiKey": "self"}' > ~/.claude/config.jsonNext, set the environment variables. The recommended method is to add them to your shell configuration file, such as ~/.zshrc or ~/.bashrc:
# Ace Data Cloud - Claude Code Proxy Configuration
export ANTHROPIC_AUTH_TOKEN="{token}"
export ANTHROPIC_BASE_URL="https://api.acedata.cloud"
Replace {token} with your API token, run source ~/.zshrc if you edited ~/.zshrc, and restart JetBrains so the integrated terminal sees the updated environment.
If you prefer to keep the variables in Claude Code’s settings file, create or edit ~/.claude/settings.json:
{
  "env": {
    "ANTHROPIC_AUTH_TOKEN": "{token}",
    "ANTHROPIC_BASE_URL": "https://api.acedata.cloud"
  }
}
Start a coding session from the IDE
For the smoothest JetBrains experience, open the IDE’s integrated terminal from the project root and run:
claudeStarting from the project root matters because the assistant should see the same file tree you are working in. If you already started Claude Code from an external terminal, you can connect it back to the IDE with the /ide command:
claude
> /ide
Two shortcuts are worth remembering. Cmd+Esc on macOS, or Ctrl+Esc on Windows and Linux, quickly opens Claude Code. Cmd+Option+K on macOS, or Alt+Ctrl+K on Windows and Linux, inserts a file reference such as @File#L1-99.
Tune the plugin settings and WSL command
JetBrains exposes plugin options under Settings → Tools → Claude Code [Beta]. The documented settings include a custom Claude command path, automatic plugin updates, and an Option+Enter behavior for inserting a new line in prompts on macOS.
For WSL users, the Claude command can be set to the following format, replacing Ubuntu with your distribution name:
wsl -d Ubuntu -- bash -lic "claude"Debugging checklist
If the IDE connection fails, check the basics before changing anything else: confirm ~/.claude/config.json exists, verify the environment variables are set, make sure the API token is valid, and restart the IDE. If the plugin still does not work, confirm it is enabled, run Claude Code from the project root, and remember that remote development mode may require installing the plugin on the remote host via Settings → Plugin (Host).
If clicking the Claude icon shows command not found, run which claude and configure the full command path in the plugin settings. For WSL, use the documented wsl -d ... -- bash -lic "claude" format.
Where to go next
The setup is small, but the payoff is practical: keep your JetBrains project open, let Claude Code work from the same root, and review changes through the IDE tools you already trust. For the full source guide and exact configuration reference, read the Claude Code JetBrains setup documentation.


Comments
Post a Comment