A Practical Guide to Generating Images with the OpenAI Images API
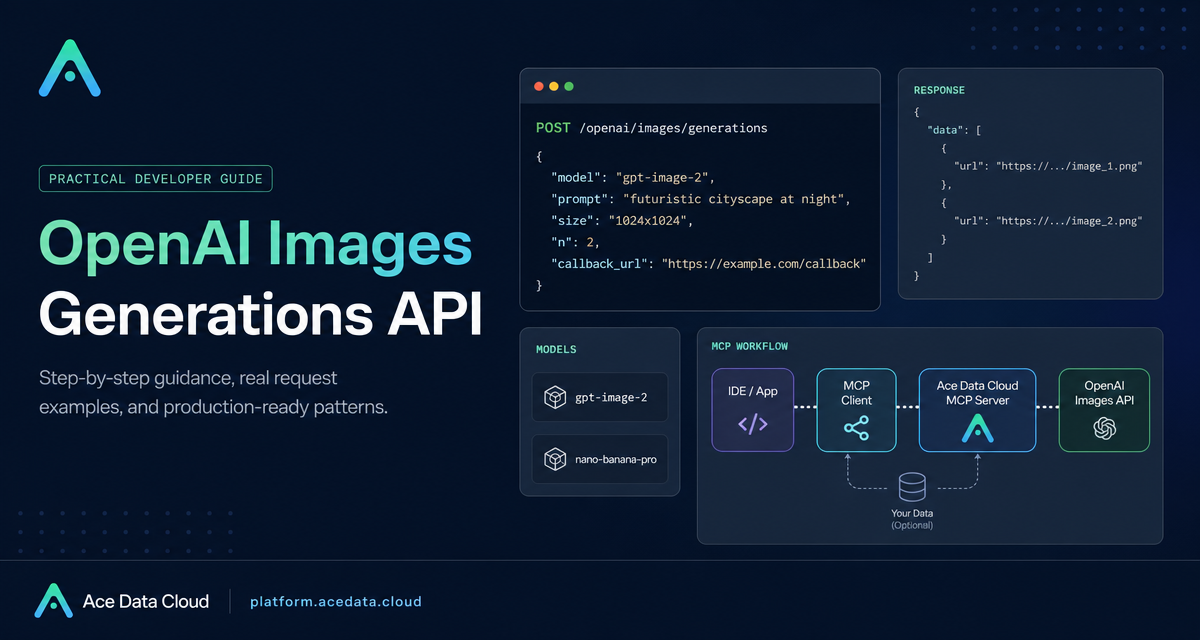
When you add image generation to a product, the hard part is rarely the first demo. The hard part is building a repeatable workflow: choose the right model, control the canvas, store the returned image URL, and decide when to run the request asynchronously instead of blocking a user action.
This guide walks through the OpenAI Images Generations API on Ace Data Cloud using the documented endpoint, fields, model names, response shape, and size rules. The goal is simple: make one reliable image-generation call, then know which knobs to reach for when your use case becomes more specific.
What you can do
The API lets you generate images from text prompts through a single endpoint: https://api.acedata.cloud/openai/images/generations. The same interface supports models such as dall-e-3, gpt-image-1, gpt-image-2, and the nano-banana family, including nano-banana-pro.
- Generate product visuals, illustrations, posters, concept art, and structured compositions from a prompt.
- Use
gpt-image-2when you need stronger instruction following, clearer English or numeric text rendering, and high-resolution support. - Use the
nano-bananafamily through the same endpoint when you want Gemini-based image generation without switching integration code. - Return hosted image URLs through
data[].urland embed them directly in apps, dashboards, or publishing workflows.
How it works
At the HTTP layer, the integration is intentionally small. Send a POST request with JSON, include authorization: Bearer {token}, and provide at least a model and prompt. The platform returns a JSON object containing a data array. Each item contains the generated image url; for OpenAI image models, a revised_prompt may also appear.
Here is the minimal Python pattern from the documented interface, adapted for a builder workflow:
import requests

url = "https://api.acedata.cloud/openai/images/generations"

headers = {
    "accept": "application/json",
    "authorization": "Bearer {token}",
    "content-type": "application/json"
}

payload = {
    "model": "gpt-image-2",
    "prompt": "A clean dashboard hero image for a developer tool, deep navy background, terminal window, API cards, precise English labels.",
    "size": "1792x1024"
}

response = requests.post(url, json=payload, headers=headers)
print(response.text)
A successful response follows this shape:
{
  "success": true,
  "task_id": "ab58a5df-6f46-4874-bff6-93169e2849a3",
  "created": 1777048800,
  "data": [
    {
      "revised_prompt": "...",
      "url": "https://platform.cdn.acedata.cloud/gpt-image/ab58a5df-6f46-4874-bff6-93169e2849a3_0.png"
    }
  ]
}
Choosing gpt-image-2 for precise outputs
If you are generating assets that include layout, counting, labels, or text, start with gpt-image-2. The documentation calls out improvements in complex composition, positional relationships, clearer text rendering for posters and infographics, and style range across portraits, retro posters, product photography, children’s illustrations, and more.
The model field is the only thing you need to change to select it:
{
  "model": "gpt-image-2",
  "prompt": "A wooden bookshelf consisting of three shelves: top shelf one book, second shelf three books, bottom shelf seven books. Soft warm lighting, photorealistic.",
  "size": "1024x1024"
}
For production usage, keep prompts explicit about subject, style, layout, text, and constraints. If you need words in the image, put the exact copy in quotes inside the prompt.
Working with size and aspect ratio
For gpt-image-2, size must either be auto or match WIDTHxHEIGHT, such as 1024x1024, 2048x1152, or 800x600. Custom sizes must use width and height values that are multiples of 16, with the long side no larger than 3840 and a total pixel count no larger than 8,294,400. If you pass a malformed value, the API returns a 400; if you exceed the supported range, expect a 4xx error.
The docs list practical presets: 1024x1024 for square, 1792x1024 for 16:9, 1024x1792 for 9:16, 1536x1024 for 4:3, and 1024x1536 for 3:4. If you omit size, the model default is used. If you pass size: "auto", the platform plans the canvas from prompt hints such as explicit pixels, ratios, platform ad formats, print conventions, photography, film, or composition.
Using Nano Banana through the same endpoint
The nano-banana series is available through the same /openai/images/generations endpoint. That makes it easy to run model experiments without rewriting your HTTP client. The documented model names include nano-banana, nano-banana-2-lite, nano-banana-2, and nano-banana-pro.
The important constraint is parameter support. Compared with gpt-image-*, Nano Banana supports only model, prompt, size, and n. Fields such as quality, style, response_format, background, and output_format are ignored. Its return format still follows the OpenAI-style data[].url shape, while created is fixed at 0 and revised_prompt equals the original prompt.
{
  "model": "nano-banana-pro",
  "prompt": "abstract painting",
  "size": "1024x1024"
}
Handling multiple images and async callbacks
The n parameter is useful when you want alternatives. The docs specify that gpt-image-2, gpt-image-1, gpt-image-1.5, and the nano-banana series support n values from 1 to 10. dall-e-3 supports only n = 1. If you use response_format=b64_json, keep n=1; for multiple outputs, use URL returns.
For long-running requests, especially large images, use callback_url. The documentation notes that a single gpt-image-2 call typically takes 60–90 seconds, while 4K can take 4–8 minutes, so callbacks are a better fit than holding an HTTP connection open.
A practical way to start
Start with one model, one prompt template, and one known-good canvas size. Store the response task_id, created, data[].url, and revised_prompt when present. Once the first path is stable, add n for variations, try size: "auto" for flexible layouts, and compare gpt-image-2 with nano-banana-pro on the same prompt.
For the full parameter reference and examples, read the OpenAI Images Generations API Integration Guide.


Comments
Post a Comment