A Practical Guide to Editing Images with gpt-image-2 over JSON
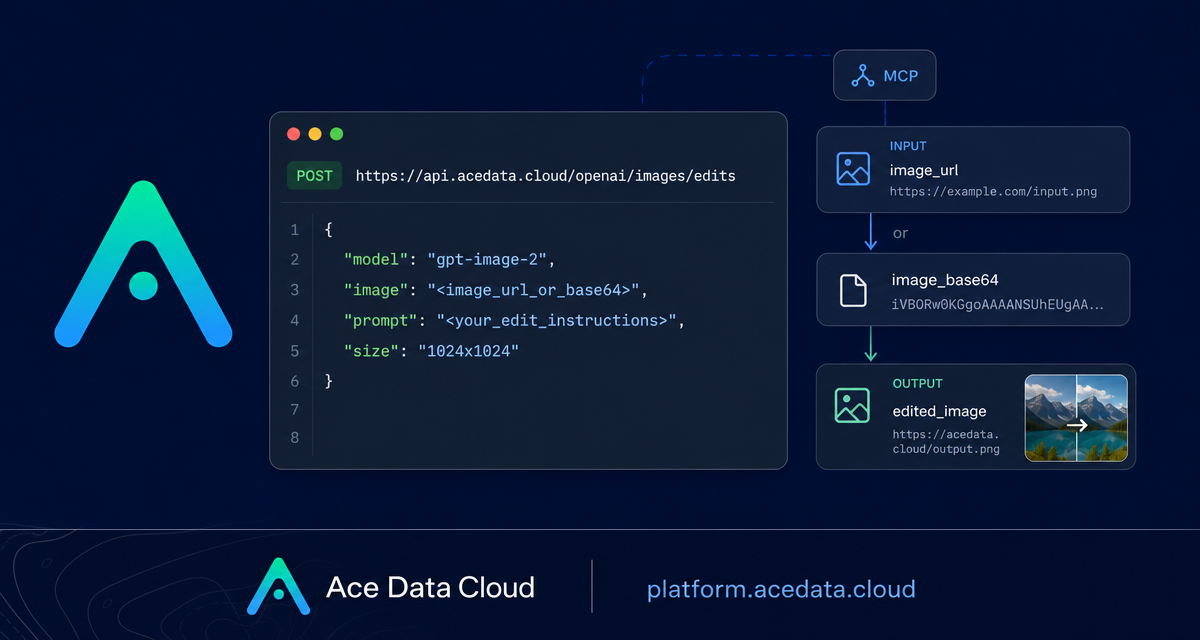
Image editing pipelines often fail at the boring part: getting a reference image into the model, preserving the parts you care about, and returning an asset your app can use without a manual download-and-upload step.
This guide walks through the OpenAI Images Edits API on Ace Data Cloud with gpt-image-2, focusing on the JSON workflow where the input image can be a URL or base64 string. The goal is not to generate something pretty, but to build a repeatable editing step that fits into a backend, CMS, product tool, or internal creative workflow.
What you can do
The edits endpoint accepts an existing image plus an instruction, then returns a modified image. According to the source documentation, the same interface supports gpt-image-1, gpt-image-2, and the nano-banana family of editing models. For this tutorial, we will use gpt-image-2 because the documented workflow includes direct JSON URL input, base64 input, multi-reference image arrays, and explicit output sizing.
- Convert an existing design to another visual style while preserving layout.
- Edit a product, poster, infographic, or UI image without downloading it first.
- Pass up to 16 reference images through the
imagefield when the task needs multiple inputs. - Request a specific
size, including common 1K, 2K, 4K, or custom dimensions that satisfy the documented constraints.
How it works
The main endpoint is:
POST https://api.acedata.cloud/openai/images/editsFor the JSON workflow, send Content-Type: application/json and include four practical fields:
model: for example,gpt-image-2.image: a URL, a base64 string such asdata:image/png;base64,..., raw base64, or an array of image references.prompt: the editing instruction. Be explicit about what should change and what should stay fixed.size: optional, but useful when you want a specific output dimension such as1024x1536or2048x1152.
The documentation notes that gpt-image-2 can keep structure more stable in editing scenarios, retain text more accurately in designs such as posters or menus, and accept image URLs directly through JSON. Those three details matter for builders: they reduce glue code, make edits easier to automate, and make the endpoint more suitable for server-side systems.
Call it with an image URL
The most convenient path is to pass an existing CDN image URL. Here is a complete curl example grounded in the documented request shape:
curl -X POST "https://api.acedata.cloud/openai/images/edits" \
  -H "Authorization: Bearer {token}" \
  -H "Content-Type: application/json" \
  -d '{
    "model": "gpt-image-2",
    "image": "https://platform.cdn.acedata.cloud/gpt-image/5c9fa635-8794-4c6d-88f8-584d7f4716c6_0.png",
    "prompt": "Convert this infographic to dark mode: dark navy background, light cream text, deep gray rounded module cards with soft shadows. Keep all layout, structure, and module arrangement identical — only invert the color scheme.",
    "size": "1024x1536"
  }'
The important part is the wording of the prompt. If the requirement is a controlled edit, say what must remain identical. “Keep all layout, structure, and module arrangement identical” gives the model a very different target than a vague “make this dark mode.”
Use Python in a backend job
If you are wiring the edit into a queue worker, admin tool, or content pipeline, a plain requests call is enough:
import requests

url = "https://api.acedata.cloud/openai/images/edits"
headers = {
    "accept": "application/json",
    "authorization": "Bearer {token}",
    "content-type": "application/json",
}
payload = {
    "model": "gpt-image-2",
    "image": "https://platform.cdn.acedata.cloud/gpt-image/5c9fa635-8794-4c6d-88f8-584d7f4716c6_0.png",
    "prompt": "Convert this infographic to dark mode while keeping the layout intact.",
    "size": "1024x1536",
}

response = requests.post(url, json=payload, headers=headers)
print(response.text)
A documented response includes success, task_id, trace_id, created, data, and elapsed. The edited asset URL appears under data[0].url, which is usually what your application stores or forwards to the next step.
Choose sizes deliberately
The size field can be auto, omitted, or written as WIDTHxHEIGHT. For gpt-image-2, custom dimensions must use width and height values that are multiples of 16, with a long side no larger than 3840 and a total pixel count no larger than 8,294,400. Invalid formats return a 400 error.
Use auto when you want to retain the reference image’s aspect ratio. Use an explicit value when your downstream surface needs a fixed format: 1024x1024 for square assets, 1792x1024 for a 16:9 1K image, or 2048x1152 for a 16:9 2K image.
When to use multiple images or base64
The image field can be an array, such as ["url1", "url2", "url3"], when the edit depends on multiple references. The documented GPT Image series limit is up to 16 images, and uploaded reference images should be png, webp, or jpg files not exceeding 50MB each.
Base64 input is useful when the image is local, private, or generated inside your own system and you do not want to publish it to an image host first:
import base64, requests

b64 = base64.b64encode(open("input.png", "rb").read()).decode()
payload = {
    "model": "gpt-image-2",
    "image": f"data:image/png;base64,{b64}",
    "prompt": "Convert this infographic to dark mode.",
    "size": "1024x1536",
}
requests.post(
    "https://api.acedata.cloud/openai/images/edits",
    json=payload,
    headers={"authorization": "Bearer {token}"},
)
A few practical guardrails
- If you request
n > 1, use URL return format. The documentation saysresponse_format=b64_jsononly supportsn=1. - If you use the OpenAI Python SDK style, set its base URL to
https://api.acedata.cloud/openaiand use your Ace Data Cloud token as the API key. - If you switch to the
nano-bananafamily on the same endpoint, keep the supported parameter range in mind:model,prompt,image, andn.
For builders, the real win is that image editing becomes a normal API step: accept an image, send a precise instruction, store data[0].url, and continue the workflow. Read the full Ace Data Cloud documentation here: OpenAI Images Edits API Integration Guide.


Comments
Post a Comment