How to Generate Images with the OpenAI Images API on Ace Data Cloud
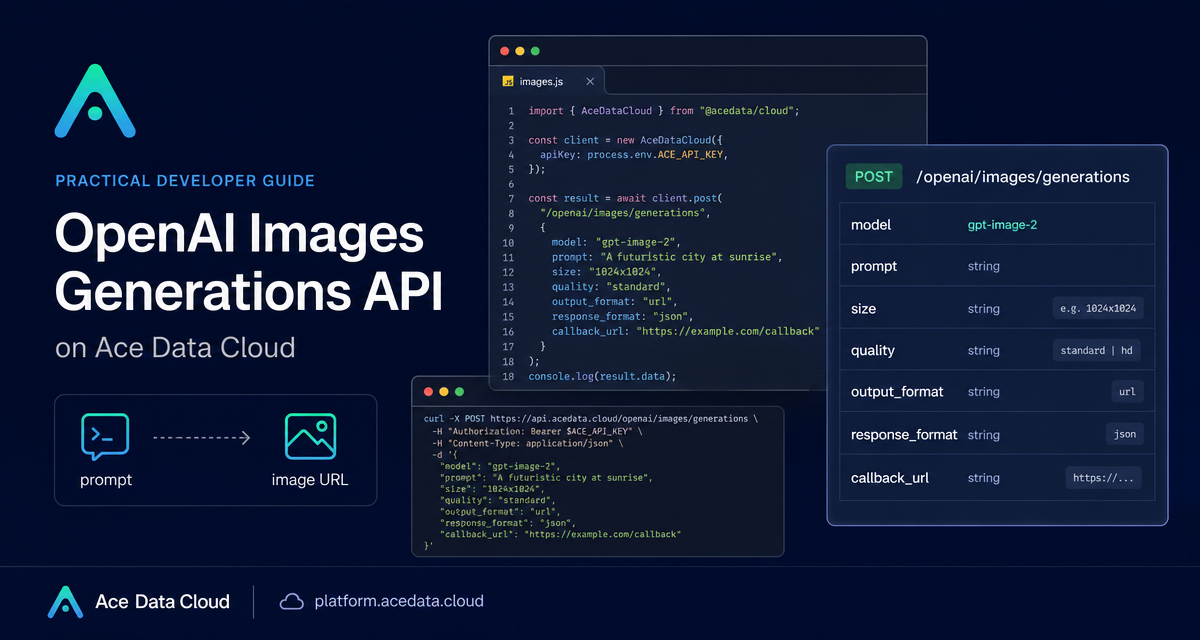
When you add image generation to a product, the hard part is rarely the prompt alone. You also need a predictable API shape, a way to choose models, a response format your backend can consume, and enough control over output size and format to fit the UI you are building.
This guide walks through the POST /openai/images/generations endpoint on Ace Data Cloud and shows how to call it as a builder: start with a plain text prompt, choose gpt-image-2, request a practical size, and return an image URL you can display in an app or store in your own pipeline.
What you can do
The OpenAI Images Generations API is a unified image generation endpoint compatible with the OpenAI Images API. According to the public API documentation, the same interface supports DALL·E 2/3, the GPT Image family including gpt-image-1, gpt-image-1.5, and gpt-image-2, plus the Nano Banana family including nano-banana, nano-banana-2, and nano-banana-pro.
For a practical product workflow, this means you can keep your application code focused on one request pattern while varying the model and output controls when needed. The documented endpoint is:
POST /openai/images/generationsThe API also exposes an OpenAI-compatible path:
POST /v1/images/generationsTypical controls documented for the endpoint include model, prompt, size, quality, style, background, output_format, moderation, and callback_url. The same endpoint can return common image formats such as PNG, JPEG, or WebP, depending on your request.
How it works
At a high level, the request is a JSON payload sent to the image generation endpoint. Your backend passes a text prompt, selects a model, and optionally sets output preferences. The service returns image generation results that your application can render, download, or pass into a later workflow.
A minimal mental model looks like this:
- Describe the image with
prompt. - Select a model such as
gpt-image-2. - Choose a canvas size with
size. - Pick an output format using
output_format. - Use the returned image URL or encoded image data in your product.
This is useful for developer tools, documentation illustrations, blog covers, product mockups, social cards, internal dashboards, or any workflow where an image needs to be generated from structured text.
Build a first request with curl
Here is a compact curl example for generating a wide technical blog cover. Replace $ACE_DATA_CLOUD_API_KEY with your own API token and adjust the prompt for your use case.
curl -sS -X POST "https://api.acedata.cloud/openai/images/generations" \ -H "Authorization: Bearer $ACE_DATA_CLOUD_API_KEY" \ -H "Content-Type: application/json" \ -d '{ "model": "gpt-image-2", "prompt": "A clean developer-tool blog cover, deep navy background, terminal window, API request card, modern SaaS style", "size": "1200x630", "quality": "high", "output_format": "png", "response_format": "url" }'The important point is that the request is explicit. The model is not hidden in a dashboard setting, the target size is part of the payload, and the output format is declared by the caller. That makes the call easier to review in code, easier to log, and easier to reproduce when you need to debug a visual result.
Use JSON as a product contract
For production code, I prefer building the payload as a normal JSON object rather than string-concatenating a curl command. That makes it easier to validate required fields and keep prompt templates separate from transport code.
{ "model": "gpt-image-2", "prompt": "A product screenshot style illustration for an API documentation page, with a terminal, JSON request, and clean dark UI", "size": "1200x630", "quality": "high", "output_format": "png", "response_format": "url"}In an app, this object can be created by a form, a template, or an internal job. For example, a documentation CMS might generate a cover image whenever a new API guide is published. A design automation script might produce several candidate visuals by changing only the prompt and model.
When to use callback delivery
The API documentation also mentions callback_url for asynchronous delivery. That is useful when image generation is part of a background job instead of a blocking user request. A user-facing editor might call the API synchronously and show a spinner, while a publishing pipeline can submit the request, return immediately, and wait for the callback before attaching the final image to an article.
A simple job-oriented payload might include:
{ "model": "gpt-image-2", "prompt": "A clean API workflow diagram with prompt input, model selection, and image URL output", "size": "1200x630", "output_format": "png", "callback_url": "https://example.com/webhooks/image-ready"}The pattern is straightforward: submit the image request from your backend, persist your own job ID, and handle the completion event at your callback endpoint. That keeps long-running media work out of the request path that serves your UI.
A few builder notes
- Keep prompts specific but not overloaded. Mention composition, style, and the core object; avoid stuffing the prompt with every possible detail.
- Use
sizeintentionally. A blog header, square avatar, and app mockup usually need different aspect ratios. - Choose
output_formatbased on where the image will live. PNG is a safe default for crisp UI-style graphics; JPEG or WebP can be better for delivery size depending on your frontend. - If your workflow runs in the background, design around
callback_urlinstead of making the user wait on an open HTTP request.
That is the main appeal of this endpoint: it gives you a small, explicit API surface for a visual generation workflow without forcing your application to special-case every model family. Start with one clear request, log the payload, store the returned image, and iterate from there.
For the full parameter reference and current model notes, read the OpenAI Images Generations API Integration Guide.


Comments
Post a Comment