How to Edit Images from Cursor with NanoBanana MCP
If you build landing pages, docs, demos, or small product experiments, image work often becomes the awkward handoff: you know exactly what you want changed, but opening a design tool breaks your coding flow.
This guide shows how to wire NanoBanana MCP into Cursor so you can generate and edit images from Agent mode using the same natural-language workflow you already use for code. The goal is not to replace a designer. It is to remove the repetitive image tasks that slow down builders: cleaning up screenshots, composing product mockups, and creating small illustrations for app states.
What you can do
The Ace Data Cloud documentation describes NanoBanana as an image tool focused not only on creating new images, but also on modifying existing images. In practical terms, the Cursor MCP integration gives you two tools:
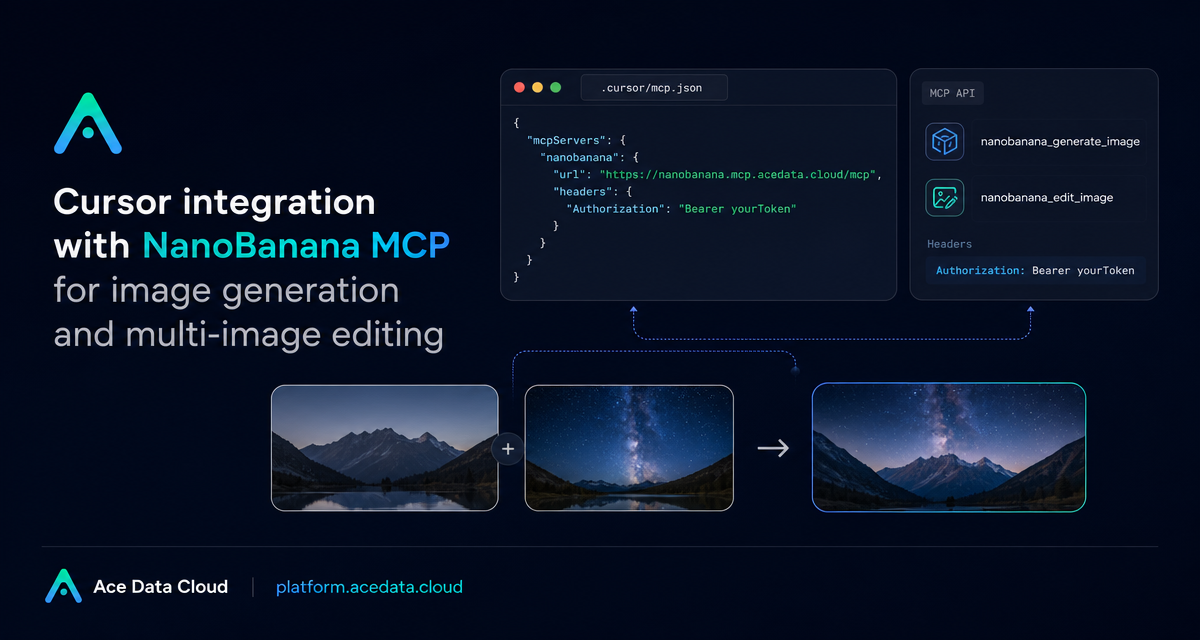
nanobanana_generate_image— text-to-image generation.nanobanana_edit_image— image editing, including multiple image inputs.
That second capability is the most useful for product work. You can provide more than one image URL and ask the model to understand the relationship between them. For example, you can place the product from one image onto the background of another, or redraw an existing asset in the visual style of a reference image.
How it works
Cursor can talk to external tools through the Model Context Protocol. For this integration, you add a project-level MCP configuration file at .cursor/mcp.json. The server is exposed over HTTP, and the request is authenticated with an Authorization header.
The only MCP URL used in the documented Cursor setup is:
https://nanobanana.mcp.acedata.cloud/mcpOnce Cursor is restarted, Agent mode can discover the NanoBanana MCP tools and call them when your prompt asks for image generation or editing.
Configure Cursor
Create a file named .cursor/mcp.json in your project root. The documented configuration uses a mcpServers object, a server name, type, url, and headers:
{
  "mcpServers": {
    "nanobanana": {
      "type": "http",
      "url": "https://nanobanana.mcp.acedata.cloud/mcp",
      "headers": {
        "Authorization": "Bearer yourToken"
      }
    }
  }
}
Replace yourToken with your Ace Data Cloud API token. The same token can be used across Ace Data Cloud MCP servers, so you do not need a separate token just for this image workflow.
After saving the file, restart Cursor. Then open Agent mode and describe the image task you want to run. I usually keep the prompt concrete: what input image is important, what should change, what must remain stable, and where the final asset will be used.
Use case 1: make raw screenshots publishable
A common builder problem is the unpolished screenshot. Terminal captures and internal tool screenshots are useful, but they often look too plain for a blog post, changelog, or README. With the MCP tool available in Cursor, you can ask for a small transformation without leaving the editor:
Edit this image, add a rounded corner shadow window decoration, and change the background to a light gray gradient.This is a good fit when the content of the screenshot matters, but the presentation needs a little polish. The prompt stays focused on layout and background treatment rather than inventing a new scene.
Use case 2: compose a product mockup from two images
The documentation highlights a multi-image workflow: using one image as the product source and another as the scene or background. That is useful for quick mockups when you want to show an app screen, phone, or product in context.
Place the phone from the first image onto the desktop in the second image, adjusting the size and perspective to make it look natural.Because nanobanana_edit_image supports multiple image URLs, you can treat the prompt almost like a short art direction note. The key is to be explicit about which image provides the object and which image provides the environment.
Use case 3: create small illustrations for product states
Not every product image starts from an existing screenshot. Sometimes you need a small illustration for a 404 page, empty state, onboarding card, or internal demo. In that case, the text-to-image tool is enough:
Generate an illustration of a small dinosaur lying next to a crack in the broken ground looking down, to be used for a 404 page.This kind of prompt is intentionally scoped. It names the subject, the scene, and the product use case. You can then iterate in Cursor with follow-up edits rather than starting over in a separate image app.
A practical workflow I would use
- Add
.cursor/mcp.jsonto the project and restart Cursor. - Keep source images in a predictable place or use stable image URLs when asking for edits.
- Start with one clear objective: beautify, compose, or generate.
- For edits, say what should stay unchanged as well as what should change.
- Save the final asset next to the page, post, or documentation section where it will be used.
The interesting part is that image work becomes part of the same builder loop as code and docs. You can be editing a README, realize a diagram or screenshot needs work, ask Cursor to call NanoBanana through MCP, and continue writing without changing tools.
Closing thoughts
NanoBanana MCP is most useful when you think of it as a small visual automation layer inside Cursor. It helps with concrete tasks: screenshot cleanup, multi-image composition, and lightweight product illustrations. The integration is also simple enough to remove if a project does not need it: the main moving part is the .cursor/mcp.json file.
If you want the exact Cursor configuration and the original examples, read the Cursor integration with NanoBanana MCP documentation.


Comments
Post a Comment