How to Build Image Generation and Editing Workflows with the Nano Banana Images API
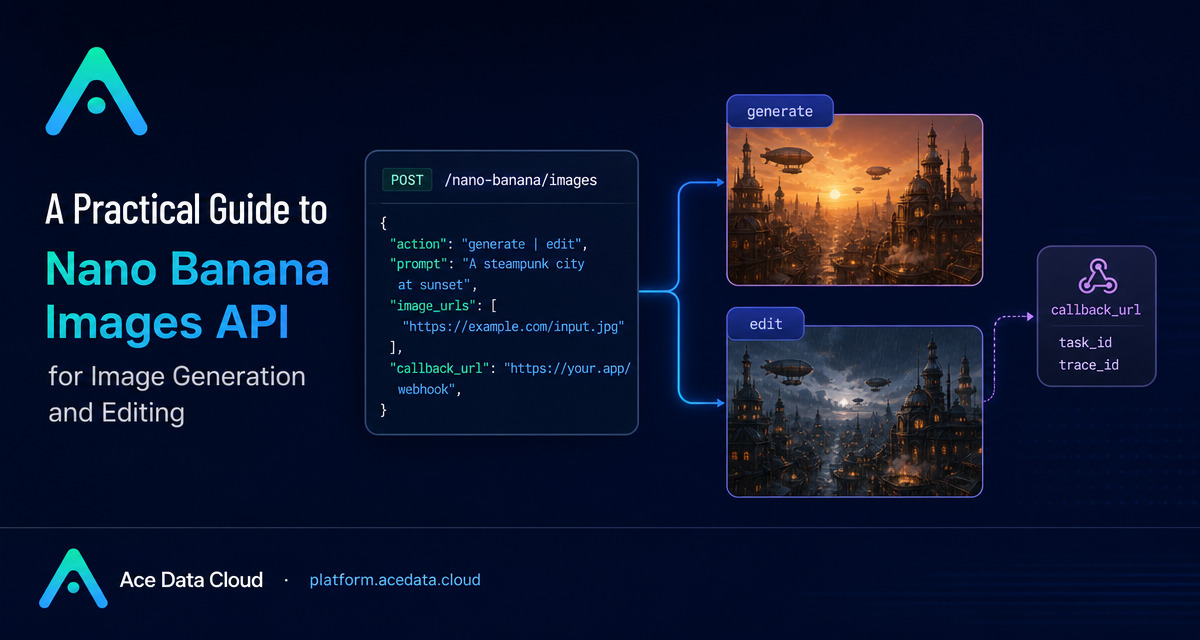
If your product needs AI images, the hard part is rarely one successful prompt. The harder part is building a repeatable workflow: text-to-image when you need a fresh asset, image editing when you need to preserve existing context, and a callback path when the job takes longer than a normal request cycle.
The Nano Banana Images API provides a compact interface for both generation and editing through the same endpoint. This guide walks through the practical shape of that workflow: what to send, what to store, and how to handle results without inventing a separate pipeline for each image task.
What you can do
The API supports two actions through POST /nano-banana/images on the base URL https://api.acedata.cloud:
action: "generate"creates images from a textprompt.action: "edit"edits one or more existing images provided throughimage_urls, using the prompt as the editing instruction.
That makes it useful for common builder workflows: creating product mockups, producing blog or landing-page visuals, turning reference images into variants, or applying a specific change to an existing asset. The same endpoint also accepts an optional callback_url for asynchronous completion notifications.
How it works
The request is a JSON body sent with three headers: authorization: Bearer {token}, accept: application/json, and content-type: application/json. For a minimal generation request, the required fields are only action and prompt. For editing, you also pass image_urls, an array with at least one publicly accessible image URL.
The response gives you fields that are worth storing in your own system:
success: whether the call succeeded.task_id: the task identifier for the image operation.trace_id: useful when debugging or correlating support logs.data[]: the returned result list, where each item includes the echoedpromptand animage_url.
The optional count parameter requests 1 to 4 images and defaults to 1. If some outputs fail, the API returns only successful images in data, and the documentation notes that only successful images are billed.
Generating an image from a prompt
For a text-to-image path, start with a clear prompt and choose a model only when you need a specific tradeoff. The optional model field defaults to nano-banana. Other documented options include nano-banana-2-lite, nano-banana-2, nano-banana-pro, and corresponding :official channel versions.
Here is a minimal cURL request using the documented endpoint and fields:
curl -X POST 'https://api.acedata.cloud/nano-banana/images' \
  -H 'authorization: Bearer {token}' \
  -H 'accept: application/json' \
  -H 'content-type: application/json' \
  -d '{
    "action": "generate",
    "model": "nano-banana-pro",
    "prompt": "A clean developer workspace with an API card, terminal window, and generated image preview in a deep navy SaaS style.",
    "count": 1
  }'
A successful response follows this shape:
{
  "success": true,
  "task_id": "70e6931b-6e34-43db-9e36-8765e2809d04",
  "trace_id": "60df8d38-f265-4986-aec7-75c9220bced2",
  "data": [
    {
      "prompt": "A clean developer workspace with an API card, terminal window, and generated image preview in a deep navy SaaS style.",
      "image_url": "https://platform2.cdn.acedata.cloud/nanobanana/example.png"
    }
  ]
}
In a production app, store both task_id and trace_id next to the user request. The image_url is the asset your UI can display or pass into a later editing step.
Editing with one or more source images
Editing uses the same endpoint, but switches action to edit. The important field is image_urls. Each item must be a direct, publicly accessible image link; the documentation recommends HTTPS, and also notes that Base64 image data can be used.
import requests

url = "https://api.acedata.cloud/nano-banana/images"
headers = {
    "authorization": "Bearer {token}",
    "accept": "application/json",
    "content-type": "application/json",
}
payload = {
    "action": "edit",
    "prompt": "Place the product from the second image into the workspace scene from the first image, keeping the lighting natural.",
    "image_urls": [
        "https://cdn.example.com/workspace.png",
        "https://cdn.example.com/product.png"
    ],
    "count": 1
}

resp = requests.post(url, json=payload, headers=headers)
print(resp.json())
This pattern is useful when you want controlled variation rather than a completely new image: for example, putting a shirt on a person, changing a product background, or combining two pieces of reference material into a single edited result.
Using callbacks for longer jobs
Image generation can take time. Instead of holding a client connection open, add callback_url to the request body. The callback URL must be publicly accessible and support POST JSON. When the task completes, Ace Data Cloud sends a payload with the same successful response structure, including success, task_id, trace_id, and data[].
A simple application flow looks like this:
- Create an image task and include your webhook URL as
callback_url. - Store the returned
task_idandtrace_id. - When the webhook arrives, match it by
task_id. - Persist every returned
image_urlfromdata[].
Error handling that helps you debug
Failures return success: false, an error object, and a trace_id. The documented error codes include token_mismatched, api_not_implemented, invalid_token, too_many_requests, and api_error. In practice, log the entire error object and always keep the trace_id; it is the fastest way to connect a user-facing failure with the underlying API request.
Putting it together
The nicest thing about this API shape is that generation, editing, synchronous results, and webhook-based completion all share the same mental model. Start with POST /nano-banana/images, choose generate or edit, keep task_id and trace_id, and treat data[].image_url as the durable output of the workflow.
If you want to wire this into your own app, read the full Nano Banana Images API documentation for the latest field descriptions and examples.


Comments
Post a Comment