How to Build an Image Editing Workflow with gpt-image-2
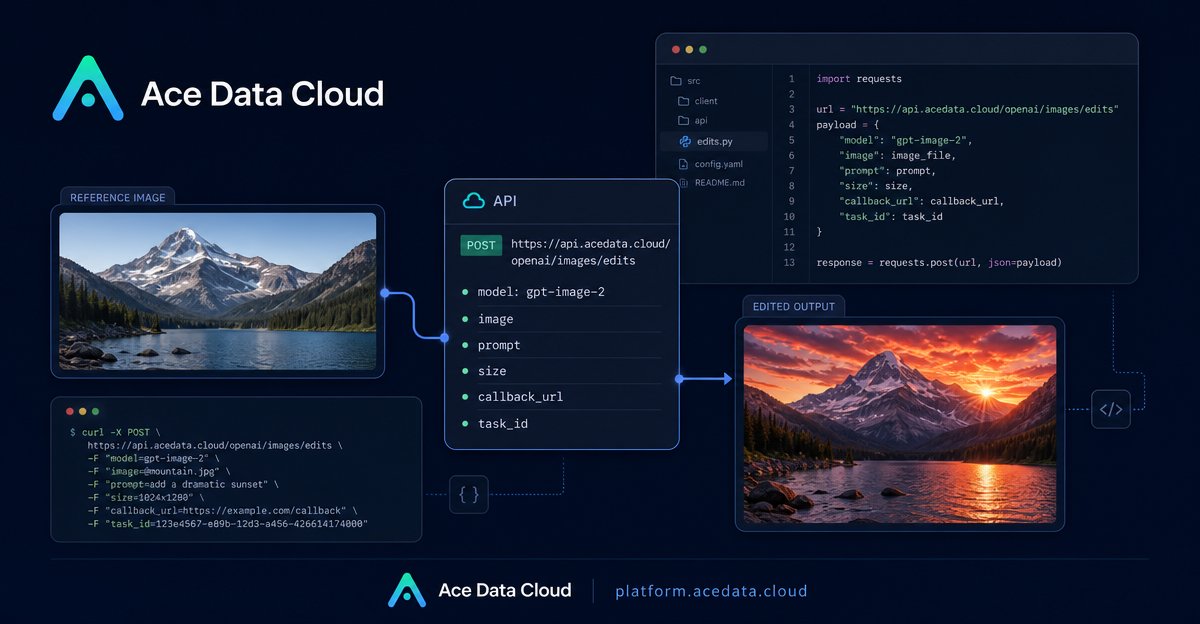
If you have ever tried to automate image editing in a product pipeline, you know the awkward part: the model needs enough reference material to preserve structure, but your backend also needs a clean API shape that works with URLs, local files, and sometimes asynchronous jobs. The OpenAI Images Edits API on Ace Data Cloud gives you a practical way to build that workflow around gpt-image-2.
What you can do
The editing interface accepts one or more input images plus a natural-language instruction, then returns modified images. According to the documentation, the same interface supports gpt-image-1, gpt-image-2, and the nano-banana model family. For this guide, we will focus on gpt-image-2, because it is the most useful option when you care about structure preservation, readable text, direct URL input, base64 input, and high-resolution redrawing through the size parameter.
Some practical use cases include:
- Turning a light infographic into a dark-mode version while keeping layout and module positions intact.
- Replacing a product scene or background without changing the arrangement of key objects.
- Combining several reference images into a composed output, such as a product bundle or gift basket.
- Building a server-side image editing pipeline where source images are already available as URLs.
How it works
The JSON endpoint used in the guide is POST https://api.acedata.cloud/openai/images/edits. For gpt-image-2, the image field can be a single image URL, an array of image URLs, a base64 string such as data:image/png;base64,..., or raw base64. The prompt describes the edit. The size field controls the requested output dimensions.
The documented custom size rules are worth treating as validation logic in your own app: width and height must be multiples of 16, the long side must be at most 3840, and the total pixel count must be at most 8,294,400. You can also pass auto or omit size and let the model choose.
Start with a single image URL
The simplest production-friendly call is JSON plus a URL. This avoids downloading the source image to your server just to upload it again. A good prompt should state both the desired change and what must remain fixed.
curl -X POST "https://api.acedata.cloud/openai/images/edits" \
  -H "Authorization: Bearer {token}" \
  -H "Content-Type: application/json" \
  -d '{
    "model": "gpt-image-2",
    "image": "https://platform.cdn.acedata.cloud/gpt-image/5c9fa635-8794-4c6d-88f8-584d7f4716c6_0.png",
    "prompt": "Convert this infographic to dark mode: dark navy background, light cream text, deep gray rounded module cards with soft shadows. Keep all layout, structure, and module arrangement identical — only invert the color scheme.",
    "size": "1024x1536"
  }'
The response includes fields such as success, task_id, trace_id, created, data, and elapsed. The edited image URL is returned under data[].url, and the model may also return revised_prompt.
{
  "success": true,
  "task_id": "cb104e35-af1f-45be-9fac-b62e2b256753",
  "trace_id": "3e5c77c6-6c2e-4bba-a42d-98ea049b58a8",
  "data": [
    {
      "revised_prompt": "Convert this infographic to dark mode...",
      "url": "https://platform.cdn.acedata.cloud/gpt-image/cb104e35-af1f-45be-9fac-b62e2b256753_0.png"
    }
  ],
  "elapsed": 83.859
}
Use multiple reference images
When the output needs to combine several inputs, pass image as an array. The documentation notes that up to 16 reference images can be provided. This is useful for product composition, brand asset remixing, or any workflow where the final image should borrow details from several sources.
import requests

url = "https://api.acedata.cloud/openai/images/edits"
headers = {
    "authorization": "Bearer {token}",
    "content-type": "application/json"
}

payload = {
    "model": "gpt-image-2",
    "image": [
        "https://example.com/item1.png",
        "https://example.com/item2.png",
        "https://example.com/item3.png"
    ],
    "prompt": "Combine all the items above into a single 'Relax & Unwind' gift basket on a clean white background, photorealistic, soft natural lighting.",
    "size": "1024x1024"
}

response = requests.post(url, json=payload, headers=headers)
print(response.text)
Handle local images with base64 or the OpenAI SDK
If your image is local and you do not want to upload it to storage first, the documented JSON path supports base64 in the image field. If you already use the official OpenAI Python SDK, the multipart editing flow is also supported; configure your SDK process with OPENAI_BASE_URL set to https://api.acedata.cloud/openai and OPENAI_API_KEY set to your token.
import base64
from openai import OpenAI

client = OpenAI()

result = client.images.edit(
    model="gpt-image-2",
    image=[open("test.png", "rb")],
    prompt="Convert this image to dark mode while keeping the layout intact."
)

image_base64 = result.data[0].b64_json
with open("edited.png", "wb") as f:
    f.write(base64.b64decode(image_base64))
Design for longer-running edits
Image edits can take long enough that keeping an HTTP connection open may not be ideal. The documentation describes an asynchronous callback pattern: include a callback_url field, receive a response containing task_id, and then accept the final edited result as a POST JSON to your callback URL when the task completes. That lets your application store the task_id, release the request thread, and update the user interface later.
A builder-friendly mental model
Treat the API as a deterministic workflow boundary, not just a prompt box. Validate size before calling. Keep prompts explicit about what should not change. Use URL input for server-side pipelines, base64 for local-only assets, and multiple references when the output needs to synthesize objects. If the edit is user-facing and slow, add callback_url and persist the returned task_id.
For the full parameter notes and examples, read the OpenAI Images Edits API Integration Guide.


Comments
Post a Comment