How to Add Remote MCP Servers to Claude Code Without Leaving the Terminal
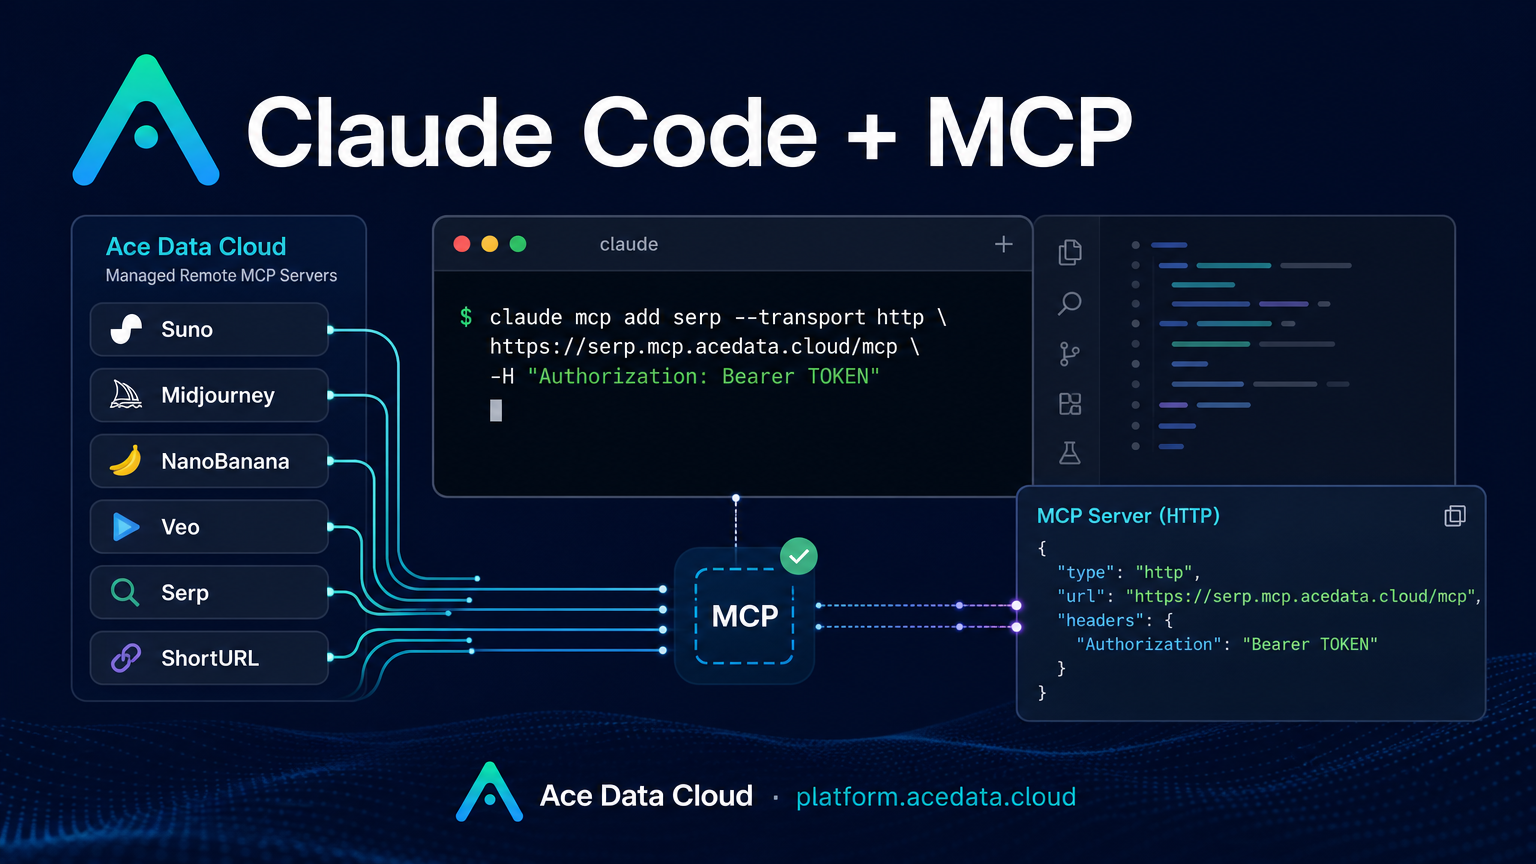
When you are building inside a terminal, the smallest context switch can break flow: opening a browser to search, jumping into a design tool for an image, or moving to another app just to prepare a short demo asset. The practical idea behind connecting MCP servers to Claude Code is simple: keep the coding assistant in the same place where you already work, and let it call external tools from there.
What you can do
Claude Code is already useful for coding, debugging, and refactoring. With Ace Data Cloud remote MCP servers configured, the same terminal workflow can also reach services for creative and utility tasks. The source documentation describes managed remote MCP servers for domains such as music, image generation, video generation, search, and short links.
For example, the documented MCP server URLs include:
https://suno.mcp.acedata.cloud/mcpfor Suno music workflows.https://midjourney.mcp.acedata.cloud/mcp,https://seedream.mcp.acedata.cloud/mcp, andhttps://nanobanana.mcp.acedata.cloud/mcpfor image-oriented workflows.https://veo.mcp.acedata.cloud/mcp,https://luma.mcp.acedata.cloud/mcp, andhttps://seedance.mcp.acedata.cloud/mcpfor video-related workflows.https://serp.mcp.acedata.cloud/mcpfor search andhttps://shorturl.mcp.acedata.cloud/mcpfor link shortening.
The useful pattern is not “add every tool because you can.” It is better to start with one or two capabilities that map to your actual build loop: search while writing technical notes, an illustration generator while drafting a README, or a short-link tool while preparing release notes.
How it works
Claude Code can add MCP servers over HTTP. Each server entry needs a name, a transport type, the remote MCP URL, and an authorization header. In the command-line method, the important pieces are --transport http, the server URL, and an uppercase -H flag for the header.
The documentation uses the header shape Authorization: Bearer 你的Token. In your own terminal, replace the placeholder with your Ace Data Cloud API token. Avoid pasting real tokens into shared screenshots, issue trackers, public repositories, or committed configuration files.
Add a focused MCP subset with claude mcp add
If your immediate goal is research-assisted development, start with search and short links. This keeps the configuration small and easy to verify:
# Search from Claude Code
claude mcp add serp --transport http https://serp.mcp.acedata.cloud/mcp   -H "Authorization: Bearer YOUR_TOKEN"

# Shorten links from Claude Code
claude mcp add shorturl --transport http https://shorturl.mcp.acedata.cloud/mcp   -H "Authorization: Bearer YOUR_TOKEN"

# Check configured MCP servers
claude mcp list
The documentation notes that without -s, the default scope is local, effective only in the current directory. If you want the server available across projects, add -s user. If you want a project-level configuration that can be shared with a team, use a project configuration file instead.
Use a project .mcp.json when the team needs the same setup
For project workflows, a .mcp.json file in the project root can define the same server entries explicitly. The documented configuration shape uses mcpServers, with each server containing type, url, and headers.
{
  "mcpServers": {
    "serp": {
      "type": "http",
      "url": "https://serp.mcp.acedata.cloud/mcp",
      "headers": { "Authorization": "Bearer YOUR_TOKEN" }
    },
    "shorturl": {
      "type": "http",
      "url": "https://shorturl.mcp.acedata.cloud/mcp",
      "headers": { "Authorization": "Bearer YOUR_TOKEN" }
    }
  }
}
There is an important security tradeoff here. A project file is convenient because everyone can see the expected server names and URLs. But real tokens should not be committed to public repositories. The source guide recommends adding .mcp.json to .gitignore and letting team members fill in their own tokens, or using environment-variable placeholders and local environment variables.
Try a builder-style workflow
Once the servers are listed, test with a task that has a clear output and a short feedback loop. For example:
Use Google Search to find recent AI video generation trends.
Then draft a technical blog outline based on the results.
Finally, shorten the key reference links for the release notes.
That kind of prompt is useful because it is easy to inspect. You can see which search results were used, whether the outline is grounded, and whether the shortened links are actually the ones you wanted. After that, you can add image or video MCP servers for more asset-heavy workflows, such as generating a product illustration while drafting documentation.
Verify and troubleshoot
Start with claude mcp list. The guide says you should see your configured servers as http type MCP servers. If a single server is not working, the documented troubleshooting flow is to check whether it is online, remove it with claude mcp remove <name>, and then add it again with the original claude mcp add command.
It is also worth understanding where configuration lives. The FAQ states that after claude mcp add, the token is stored locally in ~/.claude.json on macOS/Linux or %USERPROFILE%\.claude.json on Windows. It also notes that when a project .mcp.json conflicts with the global configuration, the project-level file takes precedence.
Where I would start
If I were adding this to a real project today, I would begin with serp and shorturl, verify them with claude mcp list, and only then add media-generation servers that match a concrete workflow. That keeps the setup understandable, avoids unnecessary credentials in project files, and gives you a quick win inside the terminal before expanding the toolchain.
For the complete list of server URLs and configuration examples, see the Claude Code MCP overview.


Comments
Post a Comment