How to Edit Images from Cursor with NanoBanana MCP
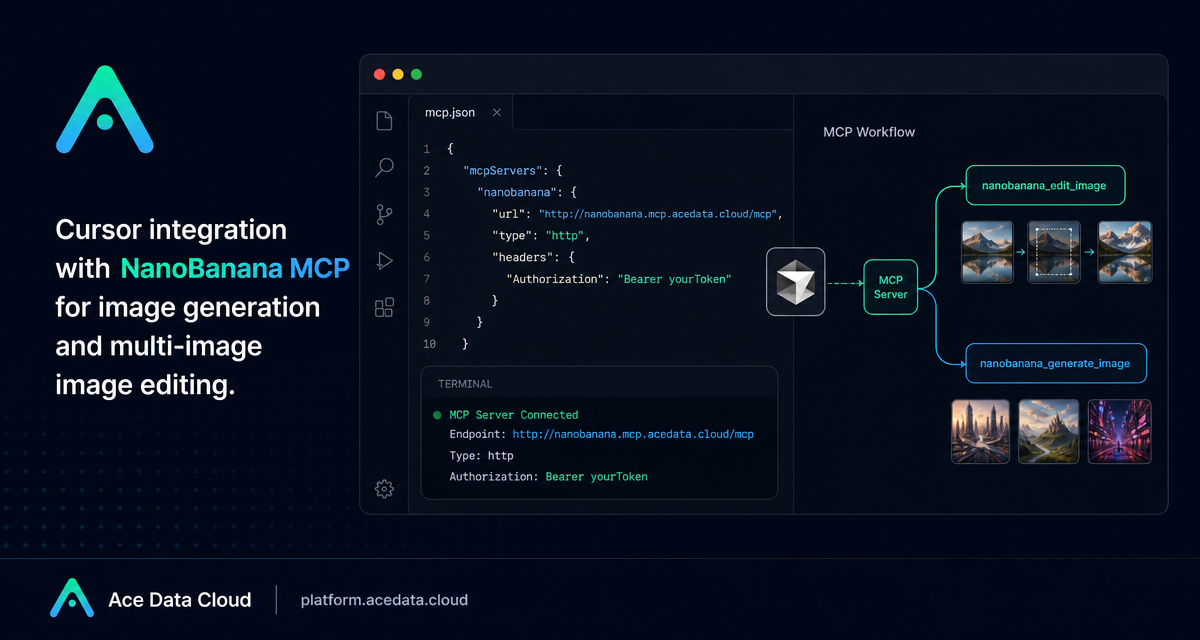
Moving image work out of a browser and into your coding workflow can remove a lot of friction, especially when the task is not “make a random picture” but “modify this exact asset in a controlled way.” NanoBanana MCP is useful in that middle ground: you can keep working in Cursor, describe the image change you want, and let the model handle generation or editing through an MCP server.
This guide walks through the practical setup for using NanoBanana MCP in Cursor, based on the public Ace Data Cloud documentation. The focus is intentionally narrow: configure the MCP server, understand what it can do, and use it for realistic image-editing tasks such as improving screenshots, combining multiple images, or producing small illustrations for product UI.
What you can do
The documented Cursor integration exposes two NanoBanana MCP tools:
nanobanana_generate_imagefor text-to-image generation.nanobanana_edit_imagefor image editing, including workflows that pass multiple image URLs.
The important detail is that NanoBanana is positioned around editing existing images, not only generating new ones. In practice, that means you can ask for changes such as a nicer presentation style for a screenshot, or a composition that uses one image as the subject and another image as the scene.
How it works
Cursor can connect to external tools through MCP. For this integration, the MCP server is configured as an HTTP server at https://nanobanana.mcp.acedata.cloud/mcp. Cursor sends tool calls to that server, and the request is authorized with an Ace Data Cloud API token in the Authorization header.
The configuration lives in your project, so it can travel with the codebase if you choose to commit an example file or share setup instructions with teammates. The sensitive part is the token; keep the real value out of version control.
Configure NanoBanana MCP in Cursor
Create a file named .cursor/mcp.json in the root directory of your project. The documented configuration uses the mcpServers object, an HTTP server type, the NanoBanana MCP URL, and a bearer token header:
{
  "mcpServers": {
    "nanobanana": {
      "type": "http",
      "url": "https://nanobanana.mcp.acedata.cloud/mcp",
      "headers": {
        "Authorization": "Bearer yourToken"
      }
    }
  }
}
After saving the file, restart Cursor. Then use Agent mode and ask Cursor to perform an image generation or editing task. The tool call is handled through MCP instead of a separate image website or manual upload flow.
Use case 1: make technical screenshots publishable
One of the simplest uses is polishing screenshots before placing them in documentation, blog posts, or changelogs. Raw terminal screenshots often look unfinished: sharp edges, inconsistent background, or no visual hierarchy.
A practical instruction can be as simple as:
Edit this image, add a rounded corner shadow window decoration, and change the background to a light gray gradient.This is a good builder workflow because the goal is not artistic novelty. You already have the important artifact — the terminal output or UI state — and you want a cleaner presentation without opening a design tool.
Use case 2: combine product and scene images
The documented editing tool supports multiple image inputs. That makes it useful for quick product-context compositions: for example, placing a product from one image into a scene from another image.
A typical Cursor prompt could be:
Place the phone from the first image onto the desktop in the second image, adjusting the size and perspective to make it look natural.This kind of task is common when a team needs a visual mockup for a landing page, internal proposal, or social preview. The useful part is not only generating an image, but preserving the relationship between the input images: one provides the object, the other provides the environment.
Use case 3: create small UI illustrations
NanoBanana can also be used for generation. The public documentation gives a 404-page style example:
Generate an illustration of a small dinosaur lying next to a crack in the broken ground looking down, to be used for a 404 page.For application teams, this is a reasonable place to use text-to-image generation: empty states, 404 pages, onboarding screens, and small editorial illustrations often need custom visuals but do not require a full design sprint.
A practical local setup pattern
For a real project, I would keep a safe example configuration in the repository and store the real token locally. The documentation shows the exact Cursor MCP shape, so a teammate can copy the structure without exposing credentials:
mkdir -p .cursor
cat > .cursor/mcp.json <<'JSON'
{
  "mcpServers": {
    "nanobanana": {
      "type": "http",
      "url": "https://nanobanana.mcp.acedata.cloud/mcp",
      "headers": {
        "Authorization": "Bearer yourToken"
      }
    }
  }
}
JSON
Before using it, replace yourToken with your own Ace Data Cloud API token. If you share the project, avoid committing the real token. The configuration itself is small, but it defines the key integration contract: type, url, and headers.Authorization.
Where this fits in a builder workflow
The best reason to connect an image model to Cursor is not that every visual task belongs inside an IDE. It is that many development tasks already start in the IDE: writing docs, preparing examples, building a landing page, or improving a product screenshot. When the image step is lightweight and contextual, calling nanobanana_edit_image or nanobanana_generate_image from Cursor keeps the workflow moving.
For the full public setup notes, see the Ace Data Cloud documentation for Cursor Integration with NanoBanana MCP.


Comments
Post a Comment