How to Use Ace Data Cloud Models in Cursor with BYOK
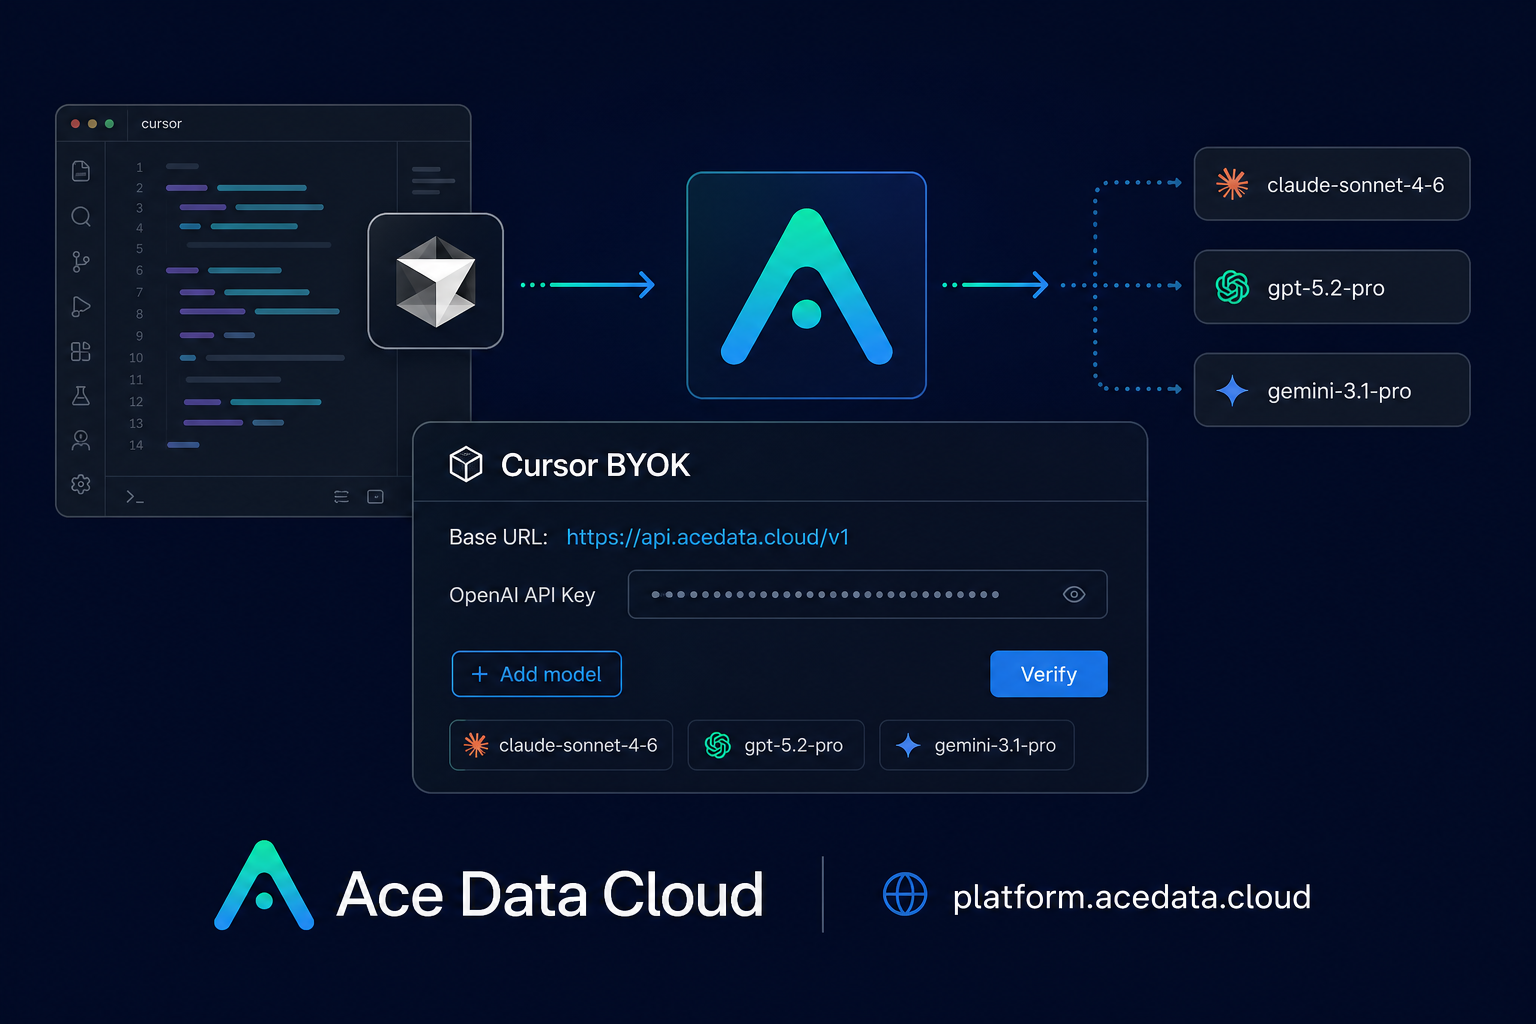
If you use Cursor every day, one practical problem shows up quickly: your editor may be excellent, but your model access can become fragmented across providers, keys, quotas, and team accounts. Cursor's BYOK flow gives you a clean escape hatch: configure one OpenAI-compatible endpoint, add the model IDs you want, and keep the actual model routing outside the editor.
This guide walks through using Ace Data Cloud as that OpenAI-compatible endpoint inside Cursor. The goal is not to replace how you work in Cursor, but to make model selection and quota management less scattered while keeping the setup simple enough for a normal development workflow.
What you can do
With the configuration described in the Ace Data Cloud Cursor documentation, you can connect Cursor's OpenAI provider slot to Ace Data Cloud by overriding the OpenAI Base URL and pasting an Ace Data Cloud API Token into Cursor's OpenAI API Key field.
- Use a single API token in Cursor's BYOK settings.
- Set the OpenAI-compatible Base URL to
https://api.acedata.cloud/v1. - Add supported model IDs such as
claude-opus-4-8,claude-sonnet-4-6,claude-haiku-4-5-20251001,gpt-5.2-pro,gpt-5.4-mini,gemini-3.1-pro, andgrok-4. - Route Cursor Chat or Agent requests through Ace Data Cloud after selecting one of the added models.
The important detail is compatibility: Cursor expects an OpenAI-style provider configuration, and Ace Data Cloud exposes the compatible interface at the /v1 base path.
How it works
Cursor's BYOK setting lets you turn on the OpenAI API Key switch and override the OpenAI Base URL. Once both switches are enabled, Cursor sends OpenAI-slot model requests to the configured base URL instead of the default OpenAI endpoint.
For Ace Data Cloud, the Base URL must be exactly:
https://api.acedata.cloud/v1The /v1 suffix matters. The source documentation explicitly notes that Cursor constructs the chat/completions path from the configured Base URL, so omitting /v1 can cause Cursor to build the wrong request path.
Step 1: Get an API token
Start in the Ace Data Cloud console and open the applications area. The documentation points users to the console applications page to obtain an API Token before configuring Cursor.
Keep that token ready, but treat it like any other production credential. Do not paste it into screenshots, commit it to a repository, or share it in a team chat unless your team has a secure credential workflow.
Step 2: Configure Cursor's OpenAI slot
Open Cursor settings from the gear icon or with Cmd/Ctrl + ,. Then go to Models and expand the API Keys section.
- Turn on the
OpenAI API Keyswitch. - Paste your Ace Data Cloud API Token into the
OpenAI API Keyinput. - Turn on
Override OpenAI Base URL. - Set the Base URL to
https://api.acedata.cloud/v1. - Click
Verifyand wait for the key check to pass.
A compact configuration checklist looks like this:
{
  "cursor_section": "Models / API Keys",
  "openai_api_key": "<Ace Data Cloud API Token>",
  "override_openai_base_url": true,
  "base_url": "https://api.acedata.cloud/v1",
  "verify": "click Verify after saving the key and base URL"
}
This is intentionally small. Most Cursor issues at this stage come from either using the wrong token or setting the base URL without the required /v1 suffix.
Step 3: Add exact model IDs
After the key verifies, return to the Models section and click + Add model. Add the model IDs exactly as supported. The documentation lists the following verified examples:
claude-opus-4-8
claude-sonnet-4-6
claude-haiku-4-5-20251001
gpt-5.2-pro
gpt-5.4-mini
gemini-3.1-pro
grok-4
Exact matching is important. If a model name has an extra prefix, a missing version segment, or a trailing space, Cursor may report that the model cannot be found.
Step 4: Use it in Chat or Agent mode
Open Cursor's Chat or Agent panel and use the model selector at the top. Choose one of the models you added. From that point, subsequent requests for that selected model go through Ace Data Cloud.
This is useful when you want different models for different tasks: one model for planning a refactor, another for generating tests, and another for reviewing a migration. The editor experience stays the same, while the provider access is centralized behind one OpenAI-compatible configuration.
Limitations to know before you rely on it
The documentation calls out a few boundaries that are worth understanding before you standardize this across a team.
- Tab completion does not use BYOK. Cursor's Tab completion continues to use Cursor's built-in models and is not affected by this configuration.
- Auto, Composer, and other editing modes may differ. Some Cursor modes may not fully use the configured Base URL.
- OpenAI-compatible models are required. Models called through Cursor's OpenAI slot must work through Ace Data Cloud's OpenAI-compatible interface.
Troubleshooting
If Cursor says Invalid API key, confirm that the value in OpenAI API Key is an Ace Data Cloud API Token, not a direct OpenAI key. Also check that the token is still available in the Ace Data Cloud console.
If a model is not found, re-check the exact model ID you entered under + Add model. The model string must match the supported name exactly.
If the Base URL does not seem to take effect, confirm that Override OpenAI Base URL is enabled, the value ends with /v1, and Cursor has been restarted after the change.
Closing notes
For builders, the main win is operational simplicity: Cursor remains the coding surface, while Ace Data Cloud becomes the place where model access, quota, and usage records are centralized. That is especially helpful when a team wants to experiment with several model families without distributing separate provider credentials to every developer.
Read the original Ace Data Cloud guide here: Using Ace Data Cloud in Cursor.


Comments
Post a Comment